Zentyal is an open-source email and groupware solution. It has its own Ubuntu-based distribution but also offers a repository for installation on top of Ubuntu Server.
The main goal of Zentyal is to provide a web-based interface to manage AD-DC, Windows File Sharing, Microsoft Exchange Server, full compatibility with Microsoft Outlook clients, and more.
Check out NethServer, another open-source operating system with similar features [Link].
A minimum of 2GB of RAM is recommended.
For this tutorial, Zentyal Development Edition 7.0 (Free) will be installed on Ubuntu 20.04 LTS.
Installing Zentyal:
hostnamectl set-hostname ad0
sudo apt update && sudo apt upgrade -y
sudo ufw allow 8443
Create and execute the installation script:
#!/bin/sh

VERSION=7.0

apt-get update
apt-get install gnupg2 -y
echo "deb http://packages.zentyal.org/zentyal $VERSION main extra" > /etc/apt/sources.list.d/zentyal-archive.list
echo "deb http://ppa.launchpad.net/oisf/suricata-stable/ubuntu focal main" >> /etc/apt/sources.list
apt-key adv --keyserver keyserver.ubuntu.com --recv-keys D7F87B2966EB736F

wget -q http://keys.zentyal.org/zentyal-$VERSION-packages.asc -O /etc/apt/trusted.gpg.d/zentyal-packages.asc

apt update

apt remove -y netplan.io

DEBIAN_FRONTEND=noninteractive apt install -y --no-install-recommends zentyal && clear
Create a new user and add it to the sudo group. Use a secure password!
adduser admin
usermod -aG sudo admin
reboot
Open a browser and go to https://10.0.0.1:8443/. Replace the IP as needed.
Log in with any local user that has sudo privileges (root is not allowed).
On the Initial Setup screen, click Continue.
Click Skip Install for now.
Go to Software Management > Zentyal Components:
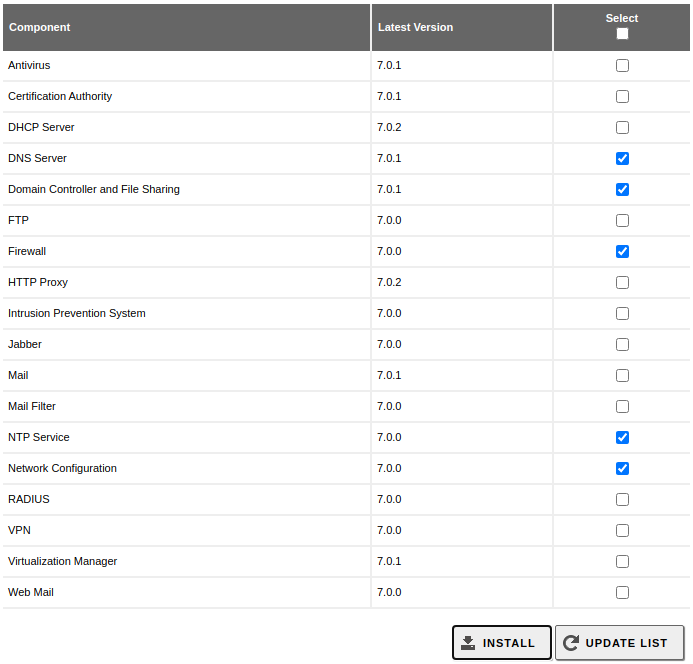
Click Install and then Continue.
Go to Module Status > System > General > Hostname and Domain:
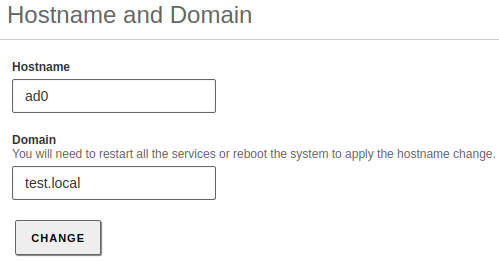
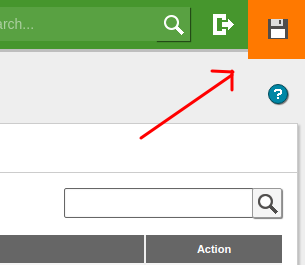
Click OK and Save Changes (see picture):
Go to Domain > Settings:
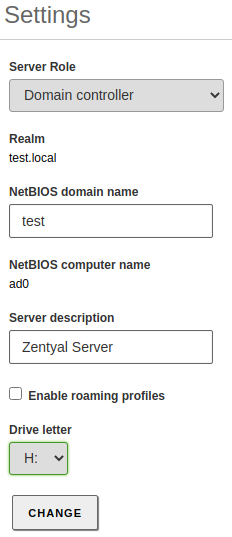
Fill in the fields as needed.
Note: if you are setting up an Additional Domain Controller, fill in the form as shown below:
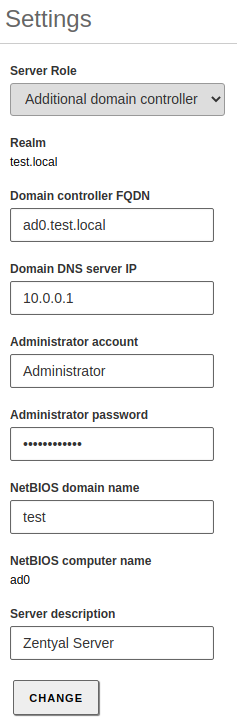
Go to Module Status > enable Domain Controller and File Sharing > click Accept.
If you see the following message:

Click the link and configure the interface.
If the IP is not reserved on the DHCP server, assign it statically.
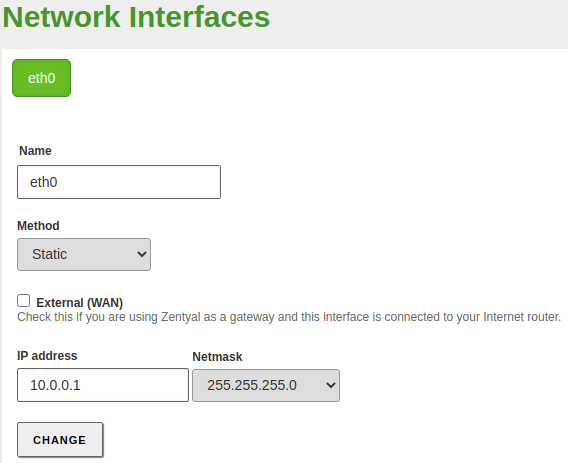
Try activating the service again and click Save Changes.
Cloud Environments: it is recommended to set the interface to a static IP and verify everything is still working before enabling the Domain Controller feature.
Create a new user called domainadmin and add it to the Domain group.
The server is now ready to create users and groups, join computers to the domain, and so on.