Checking the drives attached to the Linux server or workstation.
- mount
- Shows all mounted partitions.
- Note that it lists much more than physical or virtual volumes. It also includes logical volumes used by the kernel.
- lsblk
- Lists all disks as a tree with their partitions and mount points.
- lsblk -S
- Lists all disks in a table with additional information such as Brand, Model, Revision, Serial, etc.
- sudo disktype /dev/sdX
- Shows detailed information about a disk and its partitions.
FDISK
Popular commands for interactive mode:
- sudo fdisk /dev/sdX
- Replace X with the letter the kernel has assigned to the disk.
- m
- Prints the menu options.
- p
- Prints the partition table.
- d
- Deletes a partition. If there is more than one, it will prompt you to select which one.
- If there is only one partition, it will be selected automatically.
- n
- Creates a new partition. It will ask for the partition type: extended or primary (up to 4).
- It will then ask where the partition starts (cylinder number) and how large it will be (in KB, MB, GB, or by cylinder).
- t
- Changes a partition type.
- l
- Lists known partition types.
- F
- Lists unallocated space blocks.
- g
- Wipes the drive and creates a new GPT partition table (recommended).
- o
- Wipes the drive and creates a new MBR partition table (partitions are limited to 2 TB).
- v
- Verifies the integrity of the partition table.
- i
- Prints information about a partition.
- w
- Writes all changes to the disk and quits.
- q
- Quits without saving any changes to the disk.
- e
- Enters expert mode.
- i
- Changes the disk GUID.
- n
- Changes the name of a partition.
- u
- Changes the UUID of a partition.
- l
- Changes the table length.
- A
- Flags a legacy BIOS partition as bootable.
- p
- Prints the partition table with additional information.
- r
- Returns to the previous menu.
- i
- Enters expert mode.
fdisk can also apply changes non-interactively via scripts. See the sfdisk section in the manual for details and examples.
- sudo fdisk -l
- Lists all disks attached to the system.
CFDISK
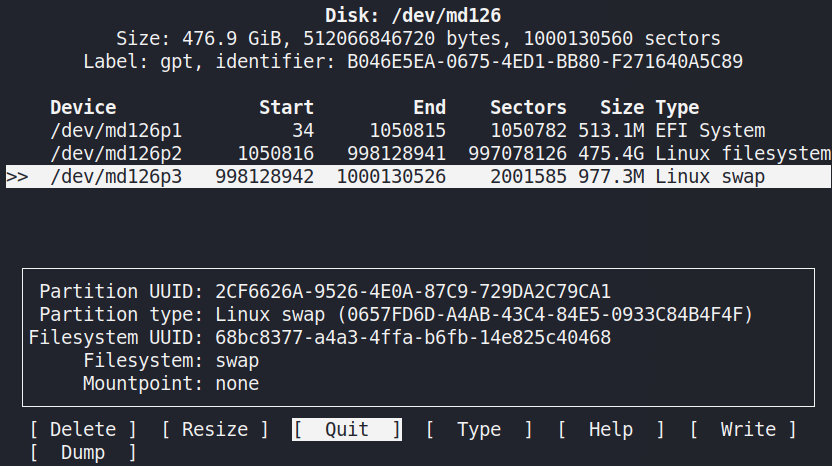
cfdisk does the same thing as fdisk but with a more visual interface. You can navigate partitions and menu options using the arrow keys or keyboard shortcuts.
- sudo cfdisk /dev/sdX
- Opens the application on the specified drive.
PARTED
Parted is a powerful partition editor. It also has a graphical version called gparted, which is the default in most GNOME-based distributions.
Important: Changes are written to the disk immediately. There is no separate write step.
- sudo parted /dev/sdX
- Opens the application for disk X.
- sudo parted
- Opens the application without specifying a disk.
- help
- Prints the available options.
- select /dev/sdX
- Selects the disk to edit.
- print
- Prints the partition table.
- help mklabel
- Shows instructions and options for the mklabel command.
- mklabel gpt
- Creates a GPT partition table on the disk. Caution: this wipes the entire disk.
- help mkpart
- Shows the available options for creating a partition.
- mkpart
- Prompts for the required information (partition name, type, start point, end point or size) and creates a new partition.
- quit
- Exits the application.
MKFS
Creating a file system (formatting) on a partition.
Once the partition table is created and partitions are defined, each partition needs to be formatted. Formatting creates the chosen file system type on the allocated disk space.
- sudo mkfs.ext4 -L “PartitionLabel” /dev/sdX1
- Formats partition 1 on disk X as EXT4 (recommended) with a label.
- The same command structure applies to:
- mkfs.vfat
- mkfs.fat (outdated)
- mkfs.ntfs (modern Windows partition)
- mkfs.ext3 (outdated)
- mkfs.ext2 (outdated)
- mkfs.bfs
- …
MOUNTING VOLUMES
Mounting volumes on boot:
ls -l /dev/disk/by-uuid/
sudo nano /etc/fstab
Append a line using one of these formats:
UUID=0e5accff-ddcb-46ac-bd52-94719086959b /mounting_point ext4 defaults 0 0

OR

/dev/sdb1 /mounting_point ext4 defaults 0 0
Apply changes without rebooting:
sudo mount -a
TUNING THE FILESYSTEM
tune2fs allows you to adjust ext2/ext3/ext4 filesystem parameters [Link]. It gives Linux administrators control over key parameters that affect the health and reliability of the system.
-l- Displays the file system structure and current parameter values.
-L- Sets the volume label of the file system.
-c- Sets the maximum mount count before the file system is checked for errors.
-O- Enables or disables specific file system features.
-r- Sets the number of reserved blocks.
sudo tune2fs -l /dev/nvme0n1p1
sudo tune2fs -L "New Label" /dev/nvme0n1p1
sudo tune2fs -c 35 /dev/nvme0n1p1
sudo tune2fs -O dir_index /dev/nvme0n1p1
sudo tune2fs -r 5 /dev/nvme0n1p1