Whonix is a privacy-focused operating system designed to provide the highest level of privacy and security possible.
It is designed to be used with the Tor network, a decentralized network that protects users’ online privacy by routing internet traffic through multiple servers.
Why Proxmox and not VirtualBox?
- Proxmox does not require a host operating system such as Windows, Mac, or Linux. It runs directly on bare metal as a headless host.
Why Whonix CLI and not the GUI version?
- There is no reason to have a GUI on a gateway that will be headless 100% of the time. It reduces RAM and CPU overhead.
Why Whonix and not OpenWRT or pfSense?
- Whonix enforces all traffic through the Tor network and is specifically designed to minimize (and potentially eliminate) the risk of leaks.
BASIC STEPS
- Download Whonix
- Import to VirtualBox
- Complete installation and test
- Export only the Gateway
- Copy the disk to Proxmox
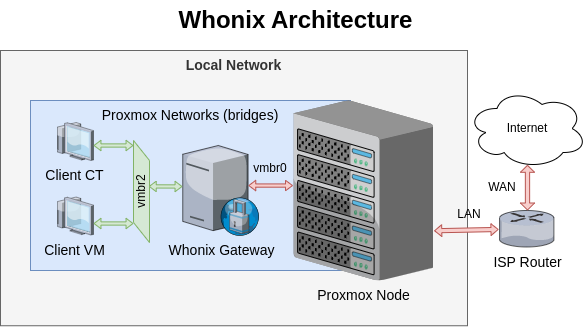
- Configure Proxmox networks (create vmbr2)
- Manually create a VM in Proxmox
- Convert and attach the disk to the VM
- Attach the second network to the VM (vmbr2)
- Configure the VM boot sequence
- Configure Whonix network interfaces (vmbr0)
- Run a client VM or container on vmbr2
DOWNLOAD
Download the OVA (Open Virtualization Format) file from the official repository [Link].
The GUI version can also be downloaded if preferred.
IMPORT TO VIRTUALBOX
This step is not mandatory but provides an opportunity to complete the installation, accept the terms of service, run tests, and so on.
Go to VirtualBox Manager > File > Import Appliance…
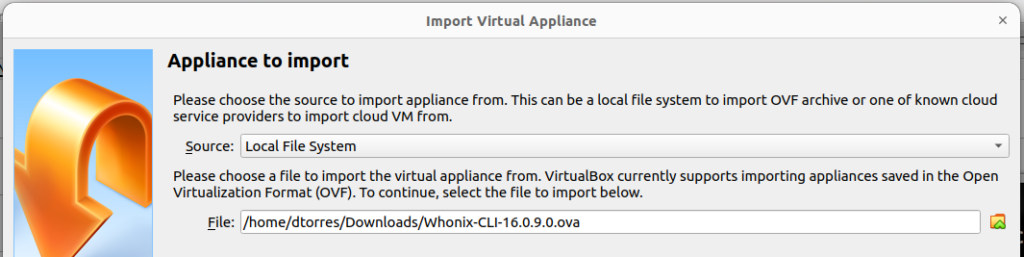
Click Next, then Import.
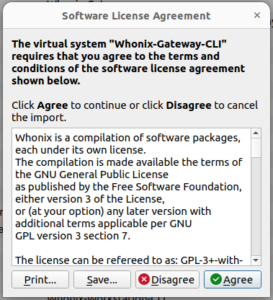
Accept both terms of service.
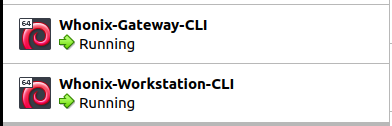
Both VMs will be deployed automatically. Start them.
COMPLETE INSTALLATION AND TEST
Log in to both VMs. Some recommend starting with the Gateway before the Workstation, but the order is up to you.
The default credentials are user and changeme. Change the password as soon as possible.
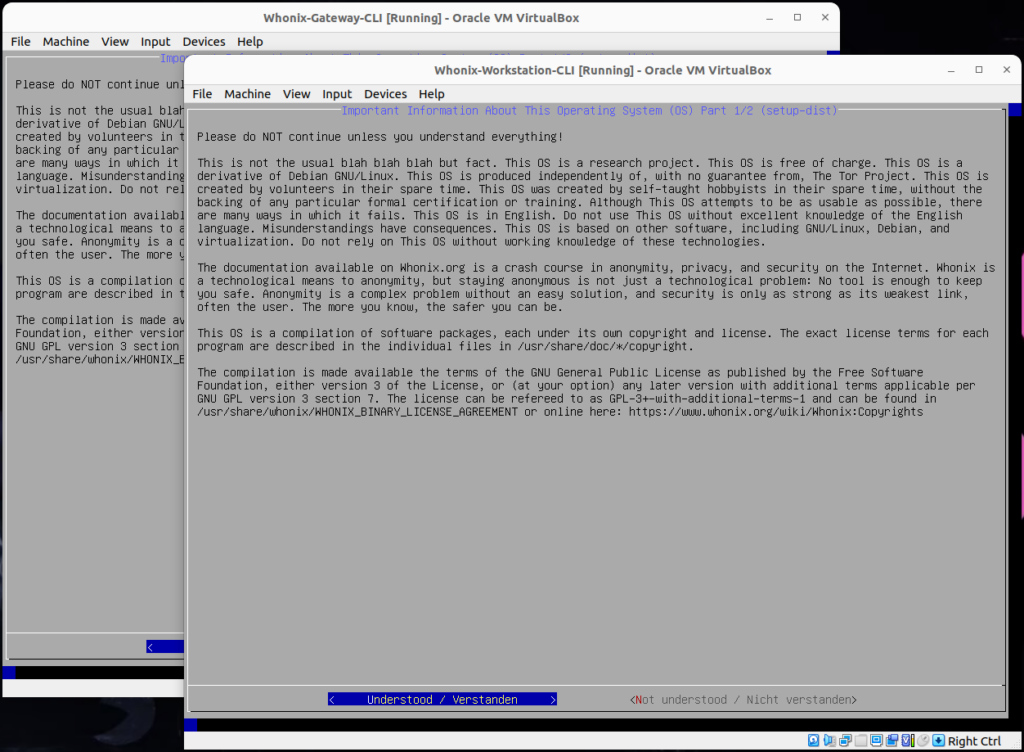
On the Gateway VM, select the option that fits your setup. For most users, option 1 is the right choice.

Setup may take several minutes to complete.
Testing the Gateway:
curl http://ip.me
The output should be an IP different from your real IP, since traffic is routed through a random Tor exit node.
This is a good time to change your password and update the gateway.
passwd
sudo apt update && sudo apt upgrade -y
Testing the Workstation:
curl http://ip.me
The same result is expected. Power off both VMs.
sudo shutdown now
EXPORT WHONIX GATEWAY
Go to VirtualBox Manager > File > Export Appliance… and select Whonix-Gateway-CLI.
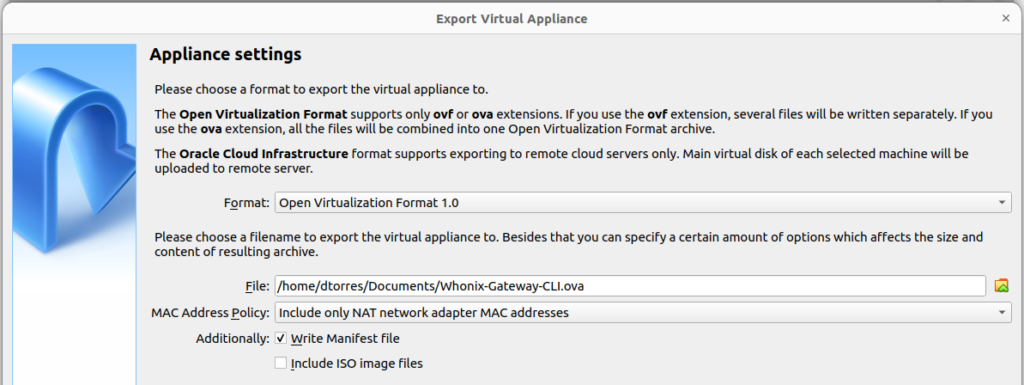
Click Next, then Export.
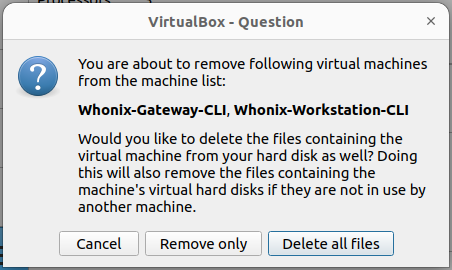
Once done, both Whonix VMs can be removed and their files deleted.
COPY THE DISK TO PROXMOX
An OVA file is similar to a TAR or ZIP archive. Extract its contents:
tar xvf Whonix-Gateway-CLI.ova
Start a temporary web server from the directory where the OVA was extracted:
python3 -m http.server 8080
Alternatively, scp can be used to copy the file over SSH.
On the Proxmox Shell, download the disk file. Adjust the URL as needed.
wget http://10.10.10.10:8080/Whonix-Gateway-CLI-disk001.vmdk
PROXMOX NETWORKS
Go to Node (pve) > System > Network > Create > Linux Bridge.
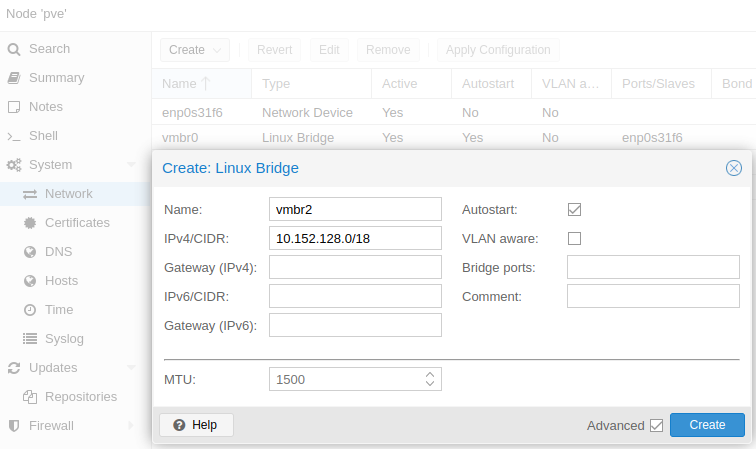
Click Apply Configuration.

Note that the new bridge has no gateway assigned and is not attached to any physical port.
CREATE VIRTUAL MACHINE
Click Create VM on the desired node. No special configuration is required when creating the VM.
Since the VirtualBox export used a SATA disk, the same bus and device number should be used to avoid any mismatch.

As shown in the VM summary, no more than 512 MB of RAM and 2 CPU cores are needed.
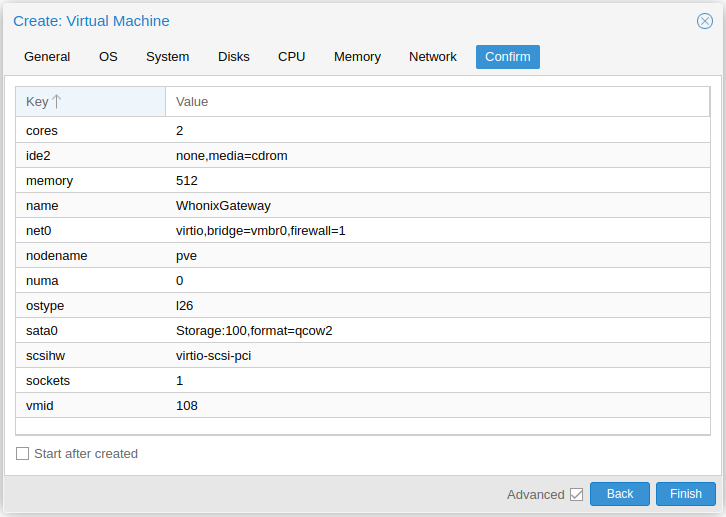
Click Finish.
ATTACH THE DISK
On the Proxmox Shell, from the directory where the disk was downloaded, run the following command:
qm importdisk 109 Whonix-Gateway-CLI-disk001.vmdk local-lvm -format qcow2
Note: Adjust the VM number and storage location as needed.
The original VMDK file can now be deleted or kept for future use.
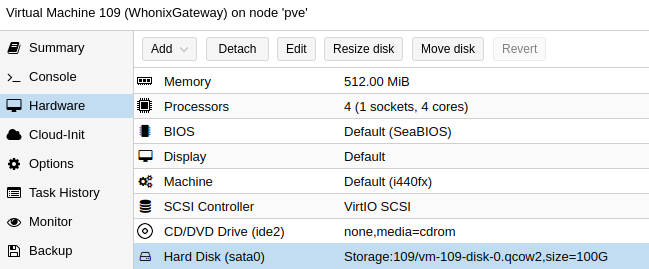
Go to WhonixGateway > Hardware, select Hard Disk (sata0), click Detach, then Remove. Double-click Unused Disk 0, select SATA, and click Add.
ATTACH SECOND NETWORK
In the same Hardware configuration, click Add > Network Device, select vmbr2, and click Add.
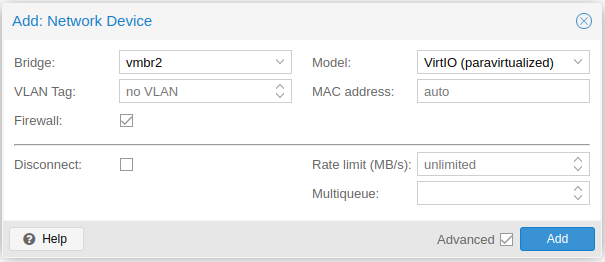
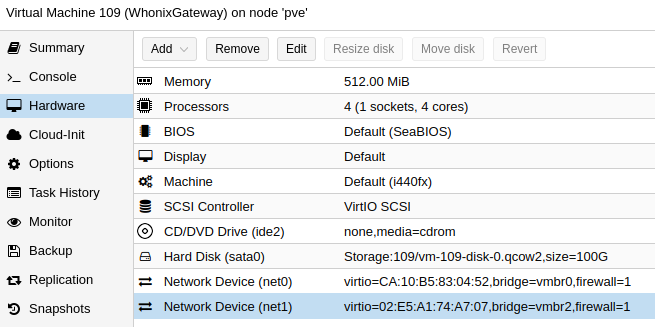
The result should look like this:
BOOT SEQUENCE
Go to Options > Boot Order > Edit and enable only sata0.
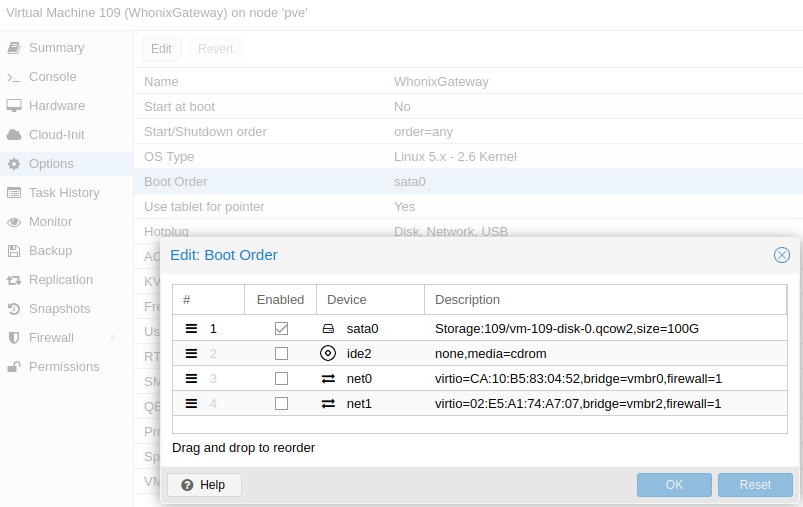
Click OK.
CONFIGURE NETWORK INTERFACE
Start the VM and open the Console.
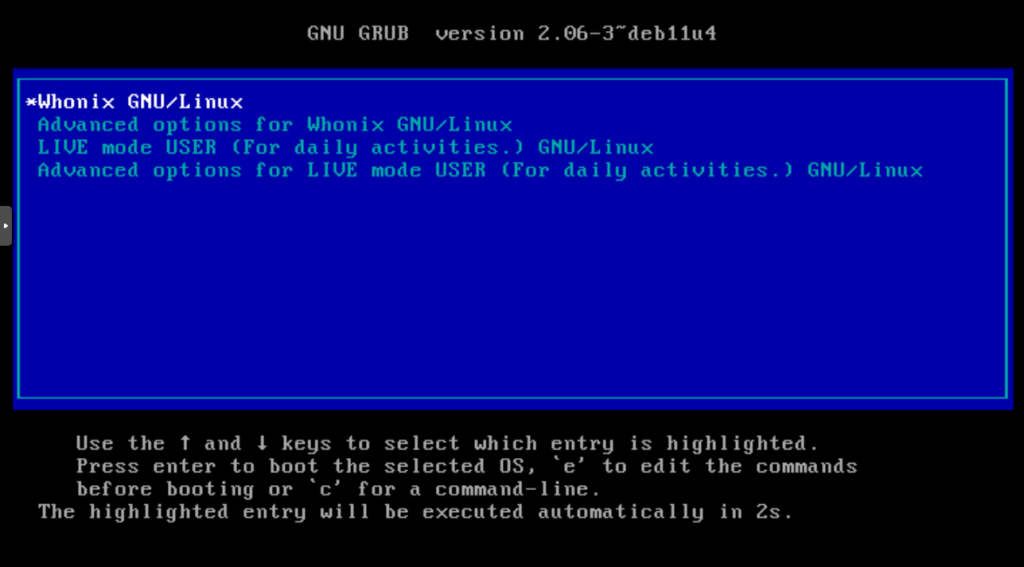
If everything went correctly, the bootloader will appear and the VM will be up within a few seconds.
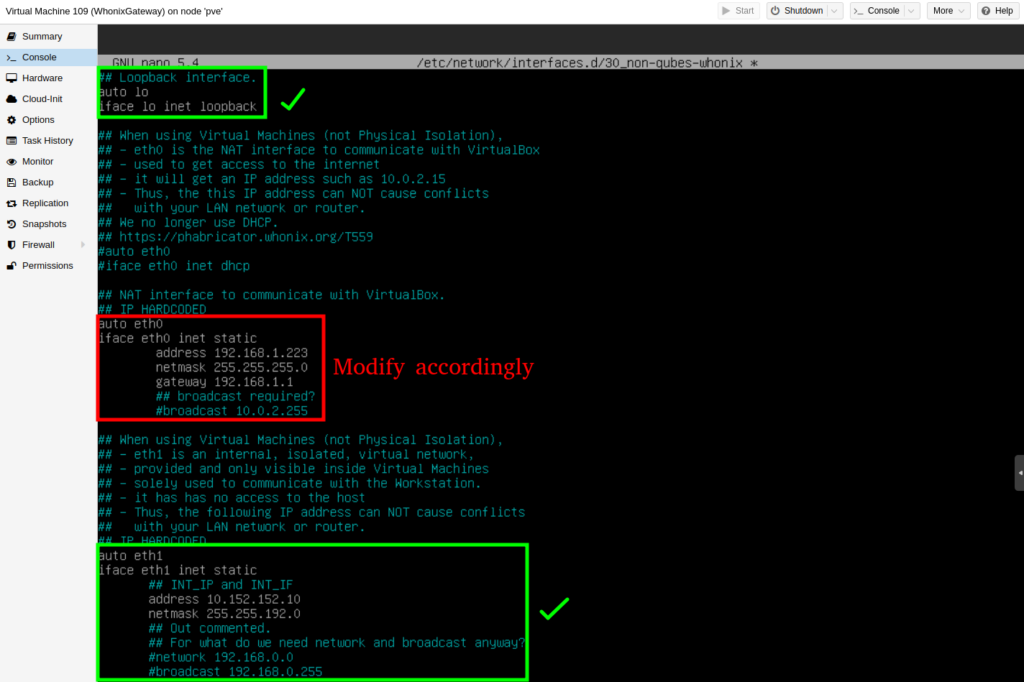
sudo nano /etc/network/interfaces.d/30_non-qubes-whonix
The eth0 interface is the public (WAN) side of the Whonix gateway, and eth1 is the private (LAN) side.
No changes are needed on the private side. On the public side, a static IP must be set to an address not already in use on your local network.
Whonix does not support DHCP, so make sure to choose an IP outside your LAN’s DHCP lease range.
Reboot the VM.
sudo reboot
Then test for internet connectivity.
sudo apt update
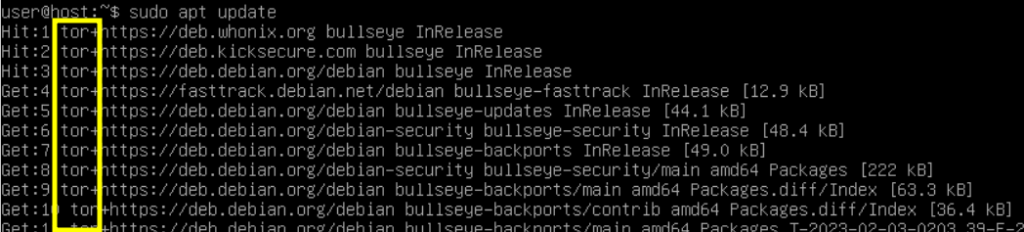
Note: The repositories are being reached through Tor. It works!
RUN A CLIENT ON THE SECONDARY NETWORK
Attach any client VM or container to the secondary isolated network vmbr2 and start it.
It will not work out of the box because the Whonix Gateway does not assign IPs to clients. This must also be configured manually.
Use the Console to configure the network interface. In this example, a Debian container is used:
nano /etc/network/interfaces
auto lo
iface lo inet loopback

auto eth0
iface eth0 inet static
        address 10.152.152.11/18
        gateway 10.152.152.10
reboot
Test for connectivity. All traffic is now routed anonymously through Tor.
BONUS
Have you heard of Qubes OS [Link]? While Whonix focuses on privacy and routes all traffic through Tor, Qubes OS takes a security-first approach through strict compartmentalization between virtual machines.
Qubes OS is a Type 1 hypervisor based on the Xen Project. It isolates workloads for maximum security and reliability, whether running separate production and development environments or safely analyzing malware without risking other systems.