If you own a Western Digital My Cloud Home, you might have noticed that product support ended mid-2023. If you’re looking for an alternative to keep using it safely, here are some reasons to take full control of your device:
- It no longer receives firmware updates or security patches, leaving your device exposed to known vulnerabilities. The number and severity of CVEs associated with this product is worth looking into.
- Its hard drive has died and a new image needs to be written to a replacement drive before powering it back on with a new HDD or SSD.
- Note: an adapter may be required because the 3.5″ HDD mounting holes are used to secure the PCB to the case:
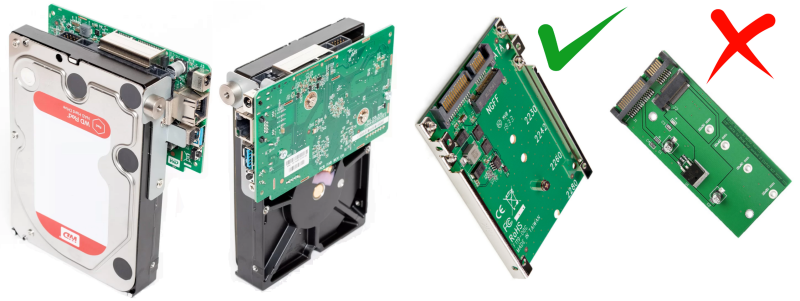
- Note: I have never found a confirmed case of anyone successfully replacing the drive. Please reach out if you got it working.
- Note: an adapter may be required because the 3.5″ HDD mounting holes are used to secure the PCB to the case:
- You want full control of your device and wish to secure it with Debian. There are many basic features WD will never support, such as:
- Using a secondary network adapter or additional storage via USB 3,
- SSH access to run or schedule tasks,
- Installing virtually any application (web server, Active Directory, printer sharing, etc.)
If you want to keep your device secure and up-to-date, follow along to install a clean Debian 11 image (built March 2023).
INSTALLATION PROCEDURE
Preparation
- Backup your data from the NAS to another location (at your own risk),
- Download the image file [Link] and decompress it (feel free to inspect the image before using it),
- Format an 8+ GB USB drive as FAT32 on MBR,
- Copy the contents of the decompressed image to the drive.
Execution
- Power off the NAS,
- Insert the USB drive,
- Press and hold the Reset button (just above the USB port),
- While holding the button, power on the device and keep it held until the light turns ON (about 30 seconds),
- Once released, keep pinging the NAS and watch for it to stop and then start responding again (this means it has rebooted),
- Remove the USB drive.
FIRST ACCESS
ssh root@IP
Find the IP assigned to the NAS by checking your DHCP server, running an ARP scan, scanning port 22, etc.
The default password is password – Change it immediately!
Perform basic system hardening: create your own account, grant it sudo privileges, disable root SSH login, and enforce SSH key authentication.
Then check for updates:
sudo apt update
sudo apt upgrade -y
sudo apt --purge autoremove -y
sudo apt autoclean -y
sudo apt dist-upgrade -y
sudo apt --purge autoremove -y
sudo apt autoclean -y
Always monitor mounted partitions with df -h as they are small and can fill up quickly. A workaround is to use symbolic links to redirect directories to the larger partition (/srv/dev-sataa24/).
UNDERSTANDING THE NEW SYSTEM
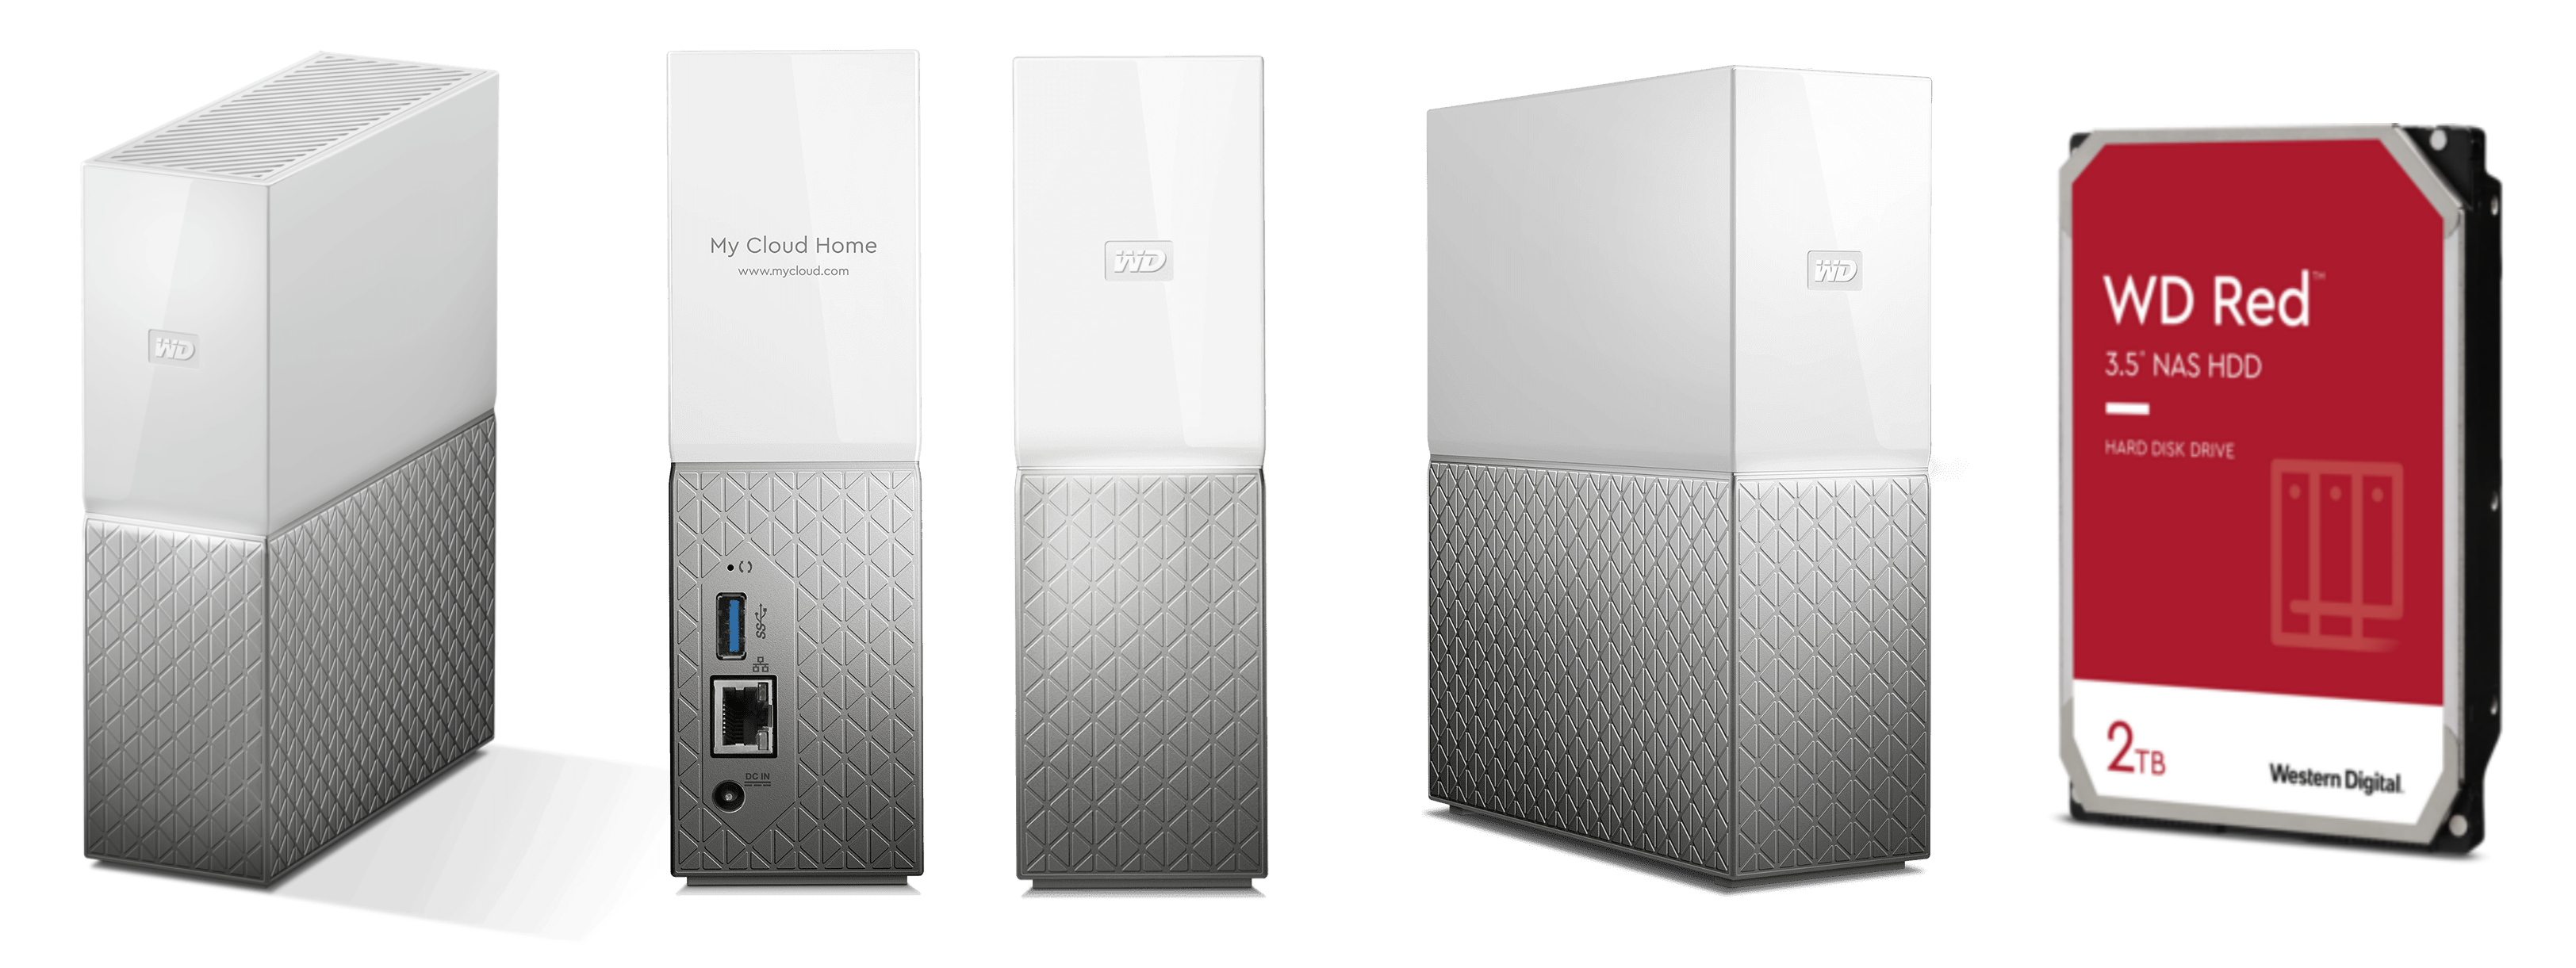
The single-bay 2 TB version (also available in higher capacities) has the following hardware specs:
- Storage: WD RED 3.5″ HDD 2TB (usable < 1.8 TB)
- Processor: ARM Cortex-A53 Quad-Core 1.4 GHz 64-bit
- Memory: 1 GB DDR3 (usable 730 MB)
- Network: Gigabit Ethernet
- USB: One USB 3.0 Type-A port on the back
- Power: ~7W (18W max) = approximately 60 kWh/year
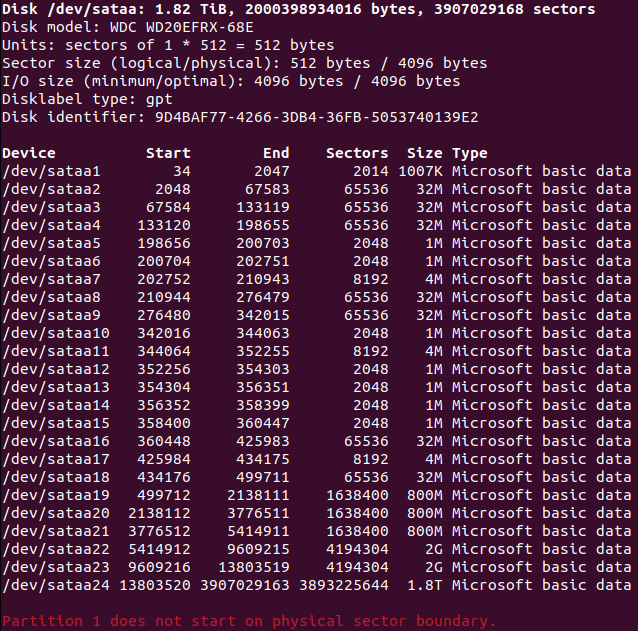
The hard drive has 24 partitions (GPT):
-
sataa1tosataa19andsataa23– Not used by the OS; leave these alone.sataa20– 775 MB (12% used) – Root filesystem/sataa21– 775 MB (67% used) – Mounted at/varsataa22– 2 GB (73% used) – Mounted at/usrsataa24– 1.8 TB – User storage, mounted at/srv/dev-sataa24/
Note: Avoid modifying partitions 1 through 23, as doing so could break the recovery procedure. The last partition can be resized to use the full drive capacity.
The USB drive image contains the following file structure:
rescue.root.sata.cpio.gz_pad.imgrescue.sata.dtbsata.uImagebluecore.audioomv/20-root.tar.gz– copied tosataa20omv/21-var.tar.gz– copied tosataa21omv/22-usr.tar.gz– copied tosataa22omv/bootConfigomv/fwtable.binomv/rootfs.bin
After the image is written, expected resource usage at idle:
- ~20% RAM (~140 MB / 730 MB)
- <5% CPU
HOW IT WAS BUILT
Credit to CyberTalk [Link], who originally released an image that replaces the WD OS with Debian 9 and OMV 4 pre-installed.
Goals and Reflections
- OMV (OpenMediaVault) 4 (Arrakis) was released in 2018 and reached EOL in 2020.
- Not all repositories were still available at the time of writing.
- Debian 9 (Stretch) was released in 2017 and reached EOL in 2020.
- There was not enough space to run
apt update.
- There was not enough space to run
- Not every use case needs OMV installed.
- All OMV-related components were stripped before upgrading.
- The goal was to keep the base image lightweight so users can install only what they need.
- In the event of a hard drive failure, a full image with the complete partition schema is available to write to a new drive [Link].
- It is unclear whether the partition schema must be preserved (cloned) for the firmware to boot correctly.
Thanks again to the CyberTalk team for the base image. I only cleaned it up and updated it.
BONUS
- Disable IPv6 if not needed,
- Update
/etc/fstabto mount the large partition at your preferred location instead of/srv/dev-sataa24, - Do not try to install UFW as it will not work as expected. Use
iptablesfor firewall rules instead (if you know how to get UFW working, please reach out). - NFS was broken on the original Debian 9 image and I could not get it working on any version (if you know how, please reach out).
- As an alternative, NFS Ganesha works:
-
sudo apt install nfs-ganesha nfs-ganesha-vfs -y
sudo nano /etc/ganesha/ganesha.conf
-
EXPORT { Export_Id = 1; Path = /PATH_TO_SHARE; Pseudo = /SHARE_NAME; Access_Type = RW; Squash = No_Root_Squash; FSAL { Name = VFS; } clients = 192.168.1.0/24; } -
sudo systemctl restart nfs-ganesha
sudo systemctl status nfs-ganesha
-
- For local network file sharing,
sambais available out of the box. - For secure remote file storage, I recommend MinIO, an enterprise-grade AWS S3-compatible server [Link].
- As an alternative, NFS Ganesha works: