OctoPrint is most commonly used on a Raspberry Pi using a dedicated OS called OctoPi (essentially a Raspbian image with OctoPrint pre-installed) [Link].
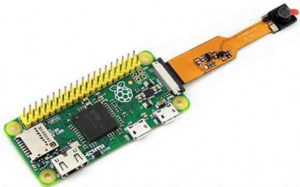
Although it can run on any Linux distribution, the Raspberry Pi is a popular choice due to its compact size, low power consumption, and compatible camera modules like this:
To deploy OctoPi on a Raspberry Pi using the official Imager, go to Choose OS > Other Specific-Purpose OS > 3D Printing, then select OctoPi.
To install on a Linux host:
sudo apt install git -y
git clone https://github.com/paukstelis/octoprint_deploy.git
sudo octoprint_deploy/octoprint_deploy.sh
To install as a Docker container:
sudo apt install git docker.io docker-compose -y
git clone https://github.com/OctoPrint/octoprint-docker.git
cd octoprint-docker
docker-compose up -d
Then, navigate to http://127.0.0.1:5000/ or http://127.0.0.1/.
Note: Replace the loopback IP address as needed. Port 5000 is used for direct access or as the default port behind a reverse proxy. Refer to the official documentation for instructions on granting the Docker container access to the webcam or USB-Serial port.
BASIC UNDERSTANDING
OctoPrint is more than just an application; it is a framework on which developers can build Plugins (extension-like applications).
Most popular Plugins:
- Bed Visualizer
- Visualizes and reports the misalignment and distortion values of the print bed to help with leveling adjustments.
- Octolapse
- Replaces the native timelapse feature with greatly expanded control over image stabilization and capture settings.
There are two ways to print through OctoPrint: from SD (a memory card inserted into the printer) or from Local (the internal storage of the OctoPi host).
- Printing from SD
- Does not require a continuous connection, as OctoPrint instructs the printer to run autonomously and simply monitors its metrics.
- Many features are unavailable in this mode because OctoPrint hands control over to the printer.
- When transferring files to the SD card via OctoPrint, transfer speed is limited to 115,200 baud over the serial connection, which is extremely slow.
- Printing from Local
- Requires OctoPrint to remain connected and running throughout the entire print.
- OctoPrint sends each movement command to the printer via USB in real time.
- File transfers to local storage are as fast as the host hardware allows.
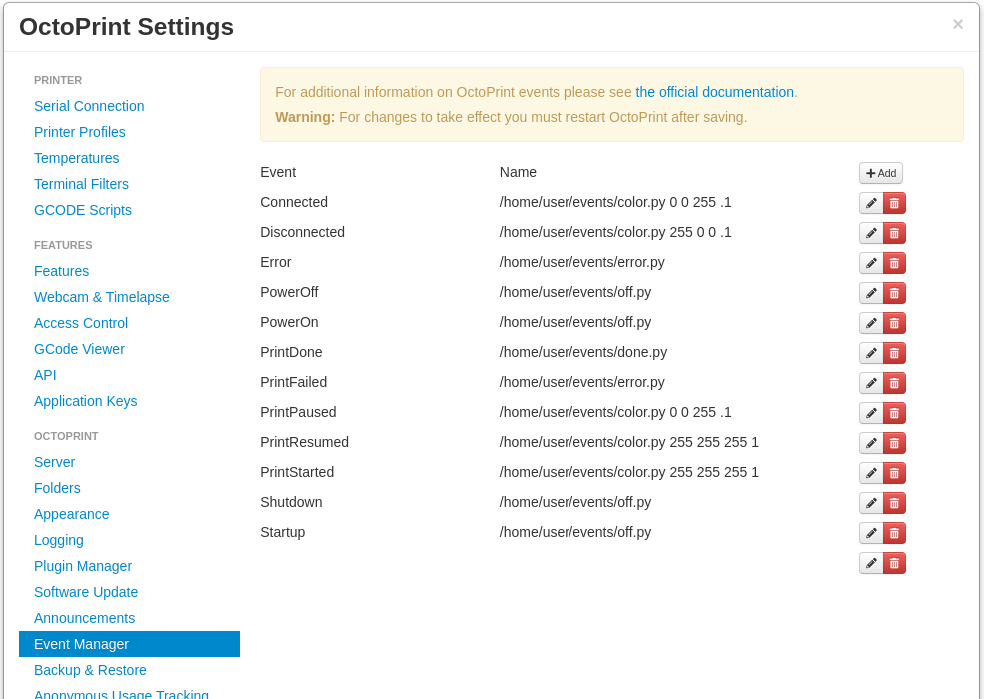
There is a section in the settings called Event Manager that allows shell commands to be executed when specific events occur.
In my case, I have a Pi HAT with RGB LEDs that I use to visually indicate the current status of the printer or print job, along with email notifications on completion or failure (virtually anything you want):
BONUS
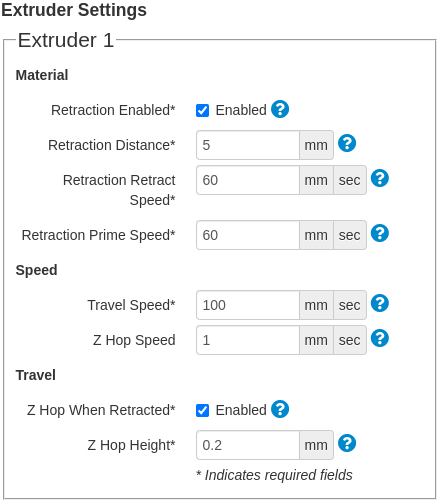
In Octolapse, these are the profile settings that worked for me on an Ender 3 V2 Neo with PLA to prevent drooping and stringing during travel moves:
READ MORE
3D Printing Tips and Tricks [Link]
Motorizing Pan Tilt on Celestron Telescope [Link]