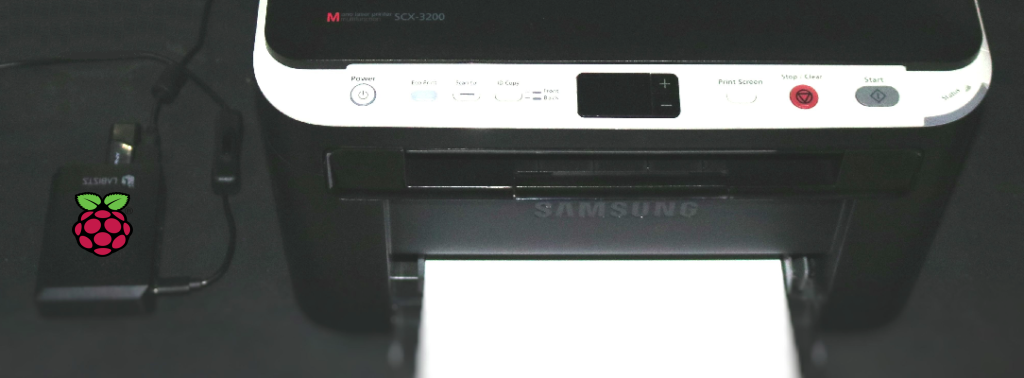
Give new life to old printers and keep your Raspberry Pi listening for print jobs while idle.
Modern printers come with integrated Wi-Fi and/or Ethernet adapters. Instead of buying a new one, you can turn any USB printer into a standalone network printer using a Raspberry Pi.
Installing CUPS
sudo apt-get update
sudo apt-get upgrade
sudo apt-get install cups
sudo usermod -a -G lpadmin pi
sudo cupsctl ‐‐remote-any
sudo service cups restart
Open a browser on the Pi and go to:
http://127.0.0.1:631 OR http://localhost:631
Or from any other computer on the same network:
http://192.168.2.40:631 (remember to use your Pi's IP)
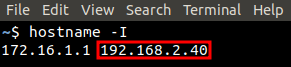
To find your Raspberry Pi’s IP address, run:
hostname -I
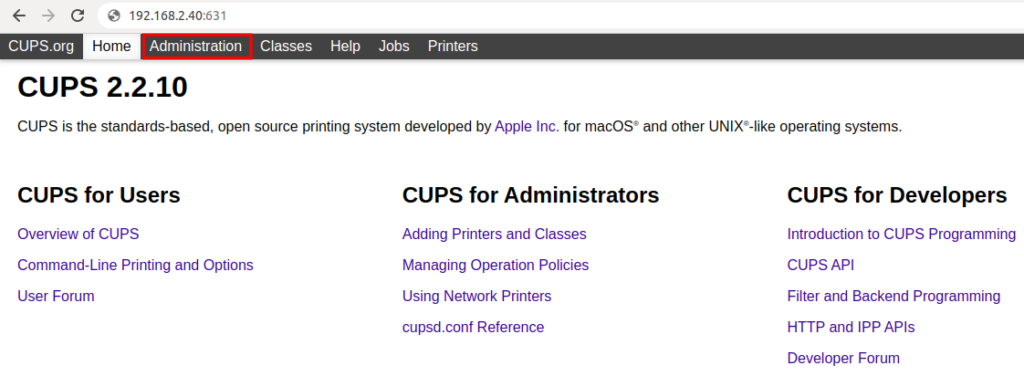
Click on ‘Administration‘ in the top menu:
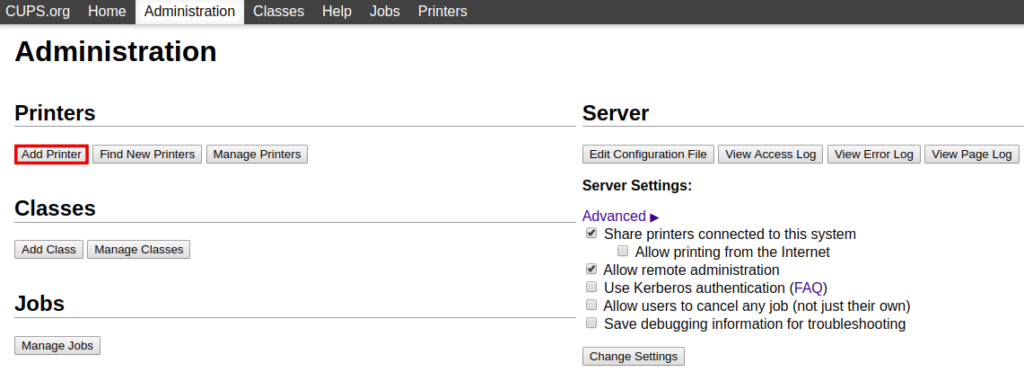
Click on ‘Add Printer‘:
You will be prompted to switch to an encrypted connection:

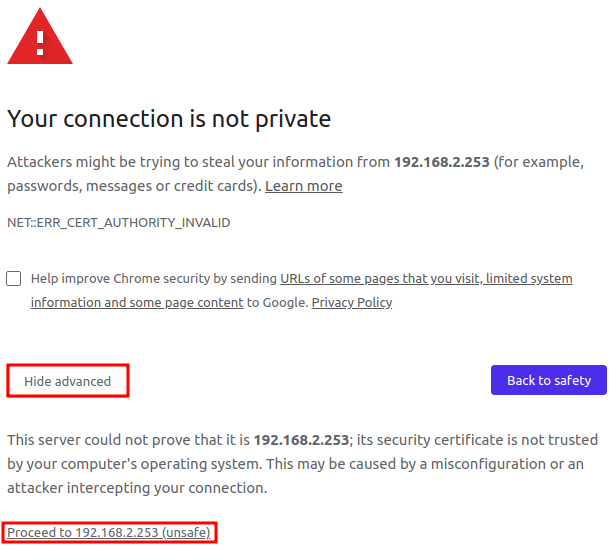
If your browser asks for confirmation (as Chrome does), click ‘Advanced‘ and then ‘Proceed to …‘ at the bottom.
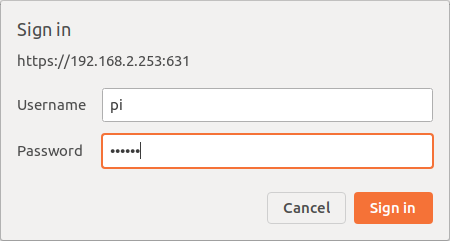
Click ‘Add Printer‘ again and authenticate with the username ‘pi‘:
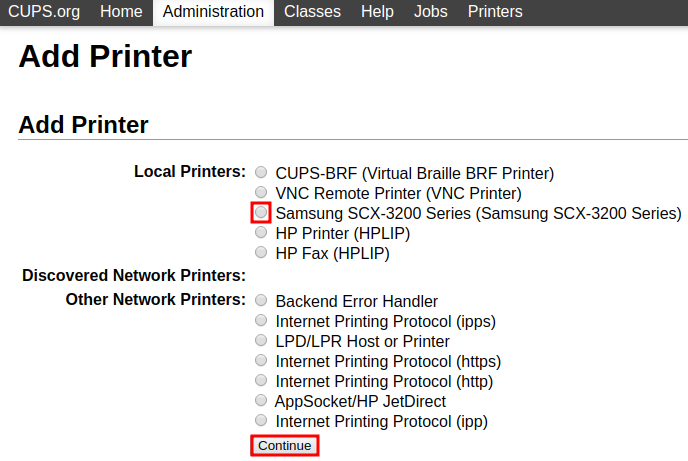
All printers connected to your Pi and already recognized will appear under ‘Local Printers‘. Select the one you want to install (in this example, the ‘Samsung SCX-3200 Series‘) and click ‘Continue‘:
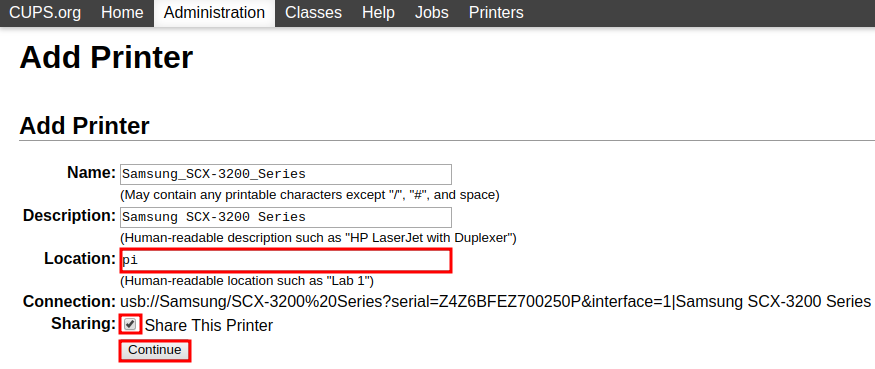
Set the location to ‘pi‘, check ‘Share This Printer‘, and click ‘Continue‘:
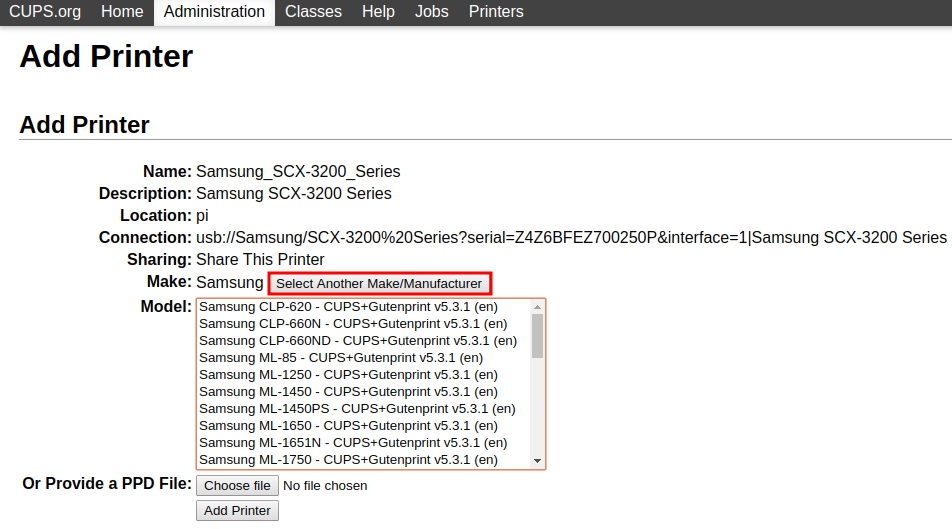
If you find a driver for your printer model or series, great! If not, look online for a compatible generic driver (one exists for the vast majority of printers). Select ‘Another Make/Manufacturer‘:
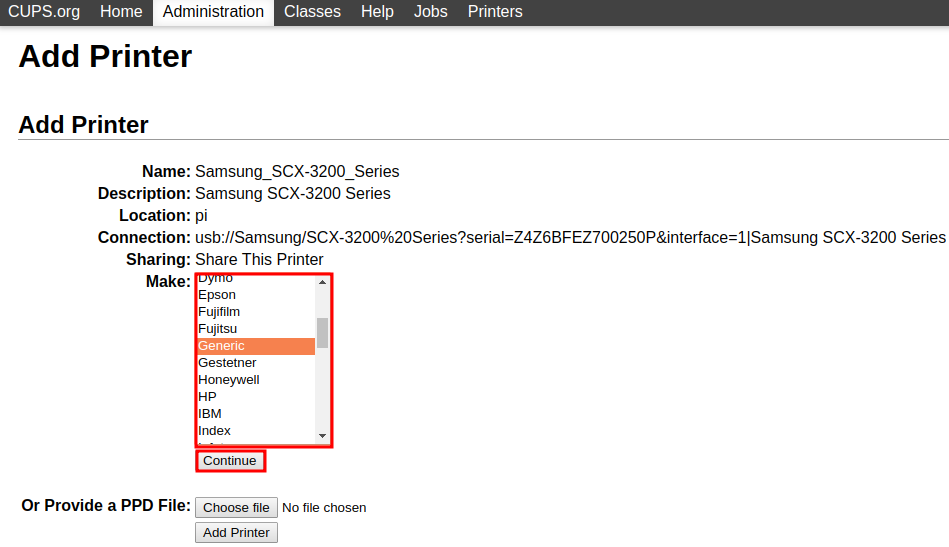
Select ‘Generic‘ and click ‘Continue‘:
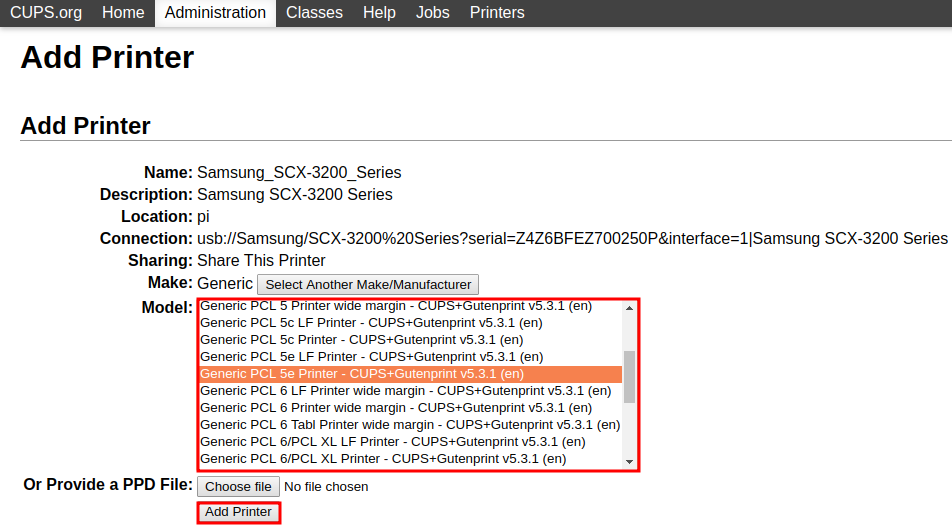
For the Samsung SCX-3200, the compatible driver is ‘Generic PCL 5e Printer‘. Select it and click ‘Add Printer‘:
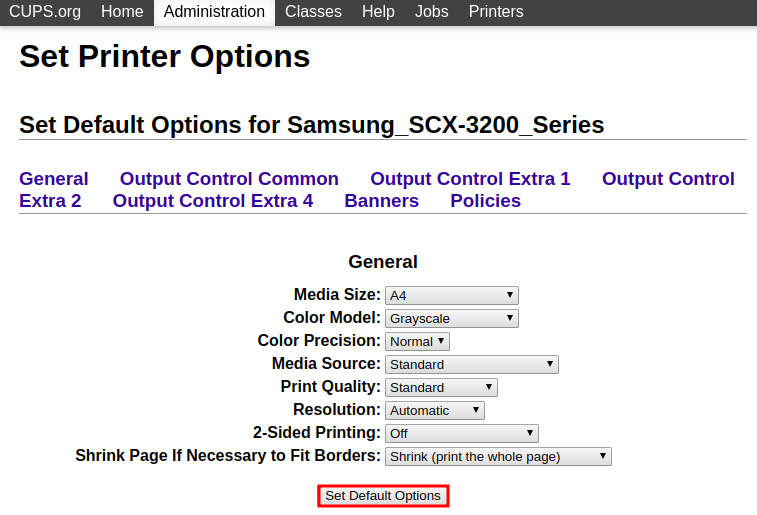
There are several configuration options, but for now just click ‘Set Default Options‘:
Printer added!
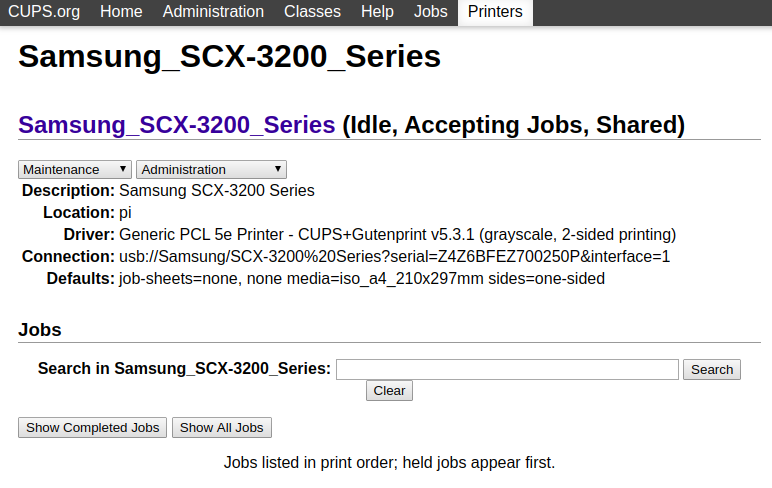
On your Pi, open a text editor and try printing something.

Installing Samba on Raspbian:
sudo apt-get install samba
sudo nano /etc/samba/samba.conf
Look for the configuration block below. This makes all CUPS printers available on the Windows network:
# CUPS printing.
[printers]
comment = All Printers
browseable = yes
path = /var/spool/samba
printable = yes
guest ok = yes
read only = yes
create mask = 0700
Make sure all values match and that no lines are commented out (remove any leading # characters).
Restart the Samba service:
sudo systemctl restart smbd
sudo systemctl status smbd

OR

sudo service smbd restart
sudo service smbd status
How to print from other computers on the network
- From another Linux desktop
- The network printer will be automatically detected and added. Nothing else needs to be done, just print!
- From Windows
- Samba allows the Pi to join the Windows network.
- You can also add the printer using IPP (Internet Printing Protocol).
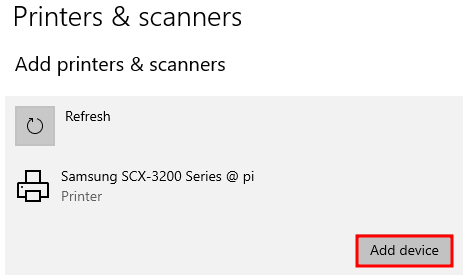
Adding the printer via Samba in Windows 10:
Click ‘Start Menu‘ > ‘Settings‘ > ‘Devices‘ > ‘Printers & Scanners‘ > ‘Add Printer or Scanner‘.
Adding the printer via IPP in Windows 10:
Click ‘Start Menu‘ > ‘Settings‘ > ‘Devices‘ > ‘Printers & Scanners‘ > ‘Add Printer or Scanner‘.
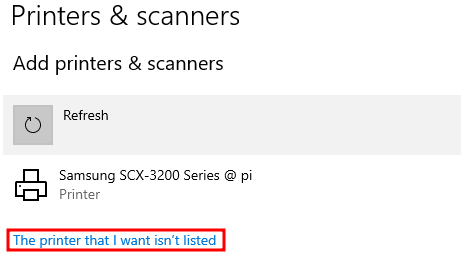
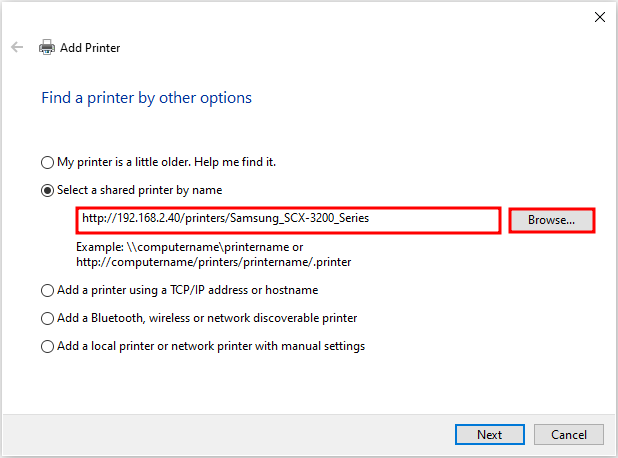
Click ‘The printer that I want isn’t listed‘ > ‘Select a shared printer by name‘.
Type ‘http://192.168.2.40/printers/Samsung_SCX-3200_Series‘, replacing ‘192.168.2.40‘ with your Pi’s IP address and ‘Samsung_SCX-3200_Series‘ with the name of your added printer:

In both cases (Samba or IPP), Windows will ask you to select the printer driver.
How many printers can I share through the Pi?
You can connect multiple printers using USB hubs and all of them will be available simultaneously, including multifunction printers.
If my printer has a scanner, how can I scan?
The scanner cannot be shared over the network directly, but it can be used via VNC, with scanned documents saved to a shared folder.
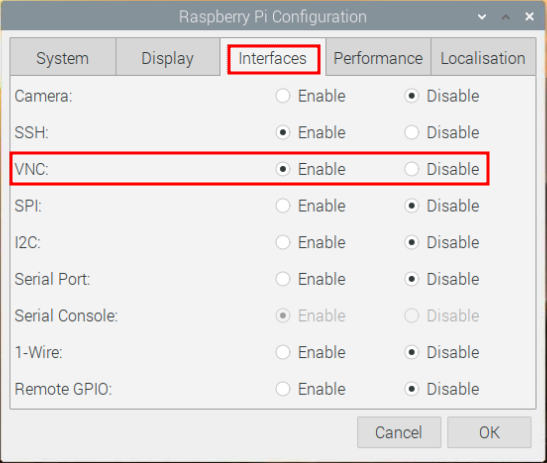
Enable VNC in ‘Raspberry Pi Configuration‘:
Install ‘Simple Scan‘:
sudo apt install simple-scan
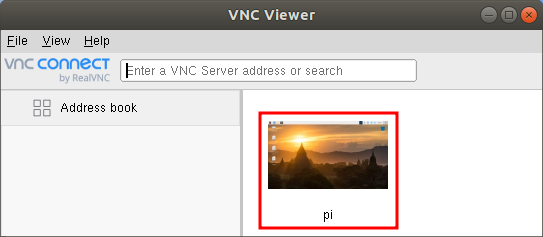
Connect to your Pi via VNC:
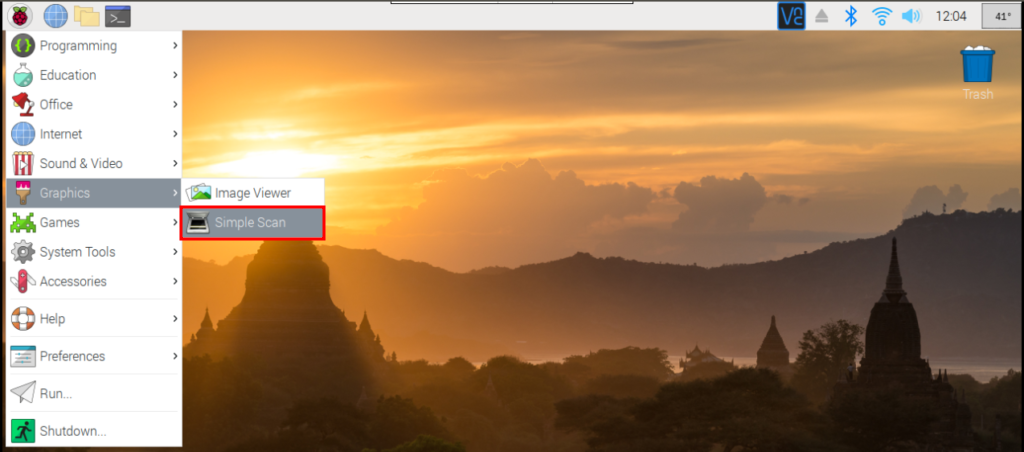
Click ‘Scan‘ for each page you want to include in the PDF, then click ‘Save‘ to a shared folder.
That simple!