GrayLog is a powerful, free, open-source centralized log management solution for capturing, storing, and enabling real-time analysis.
It requires at least 4 GB of RAM on the server because it runs a NoSQL database (MongoDB) and a search and analytics engine (Elasticsearch) side-by-side.
SERVER-SIDE UBUNTU 20.04
Preparing the system:
sudo apt update && sudo apt upgrade -y
sudo apt install bash-completion apt-transport-https uuid-runtime pwgen openjdk-11-jre-headless nano net-tools pwgen -y
Installing MongoDB:
sudo apt install mongodb-server -y
sudo systemctl enable mongodb && sudo systemctl start mongodb
sudo systemctl --type=service --state=active | grep mongod
sudo netstat -tulpn | grep 27017
Installing Elasticsearch:
wget -qO - https://artifacts.elastic.co/GPG-KEY-elasticsearch | sudo apt-key add -
echo "deb https://artifacts.elastic.co/packages/oss-7.x/apt stable main" | sudo tee -a /etc/apt/sources.list.d/elastic-7.x.list
sudo apt update && sudo apt install elasticsearch-oss -y
Configuring:
sudo tee -a /etc/elasticsearch/elasticsearch.yml > /dev/null <<EOT
cluster.name: graylog
action.auto_create_index: false
EOT
Applying and testing:
sudo systemctl enable elasticsearch && sudo systemctl restart elasticsearch
sudo systemctl --type=service --state=active | grep elasticsearch
sudo netstat -tulpn | grep 9200
Installing GrayLog:
wget https://packages.graylog2.org/repo/packages/graylog-4.2-repository_latest.deb
sudo dpkg -i graylog-4.2-repository_latest.deb
sudo apt update && sudo apt install graylog-server graylog-enterprise-plugins graylog-integrations-plugins graylog-enterprise-integrations-plugins -y
Generate a hash for the Password Secret:
pwgen -N 1 -s 96
Generate the hash for the Admin Password:
echo -n "Enter a STRONG Password: " && head -1 </dev/stdin | tr -d '\n' | sha256sum | cut -d" " -f1
Then edit the configuration file:
sudo nano /etc/graylog/server/server.conf
Find the following variables and apply the hashes you created:
password_secret = 7Eh8mSFuIA2BWtjBdX6Jkh8m6fVSAhRbz0ONB8rAOVQH281wXuvNeBZBBjPQtU2I3qNuH2ALPK0kFat7djAUYGq6mYfXHIHv
root_password_sha2 = 2a5d3f2d632a9969faab939ef7889efd7afd4c193c49d40b9f9f7152faec75d3
http_bind_address = 0.0.0.0:9000
sudo systemctl enable graylog-server && sudo systemctl start graylog-server
sudo tail -f /var/log/graylog-server/server.log | grep "Graylog server up and running"
sudo systemctl --type=service --state=active | grep graylog
sudo netstat -tulpn | grep 9000
curl http://127.0.0.1:9000
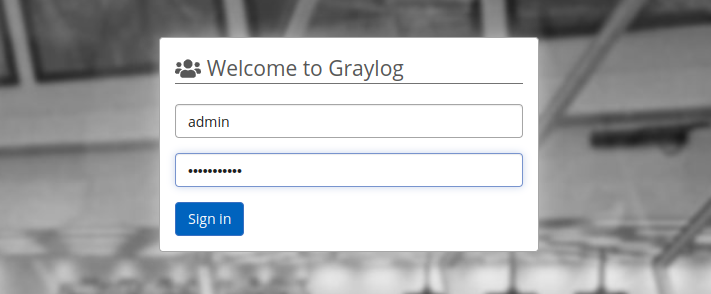
Use a browser to navigate to the server’s IP address on port 9000 (e.g. http://10.10.10.10:9000) and log in with the password you created:
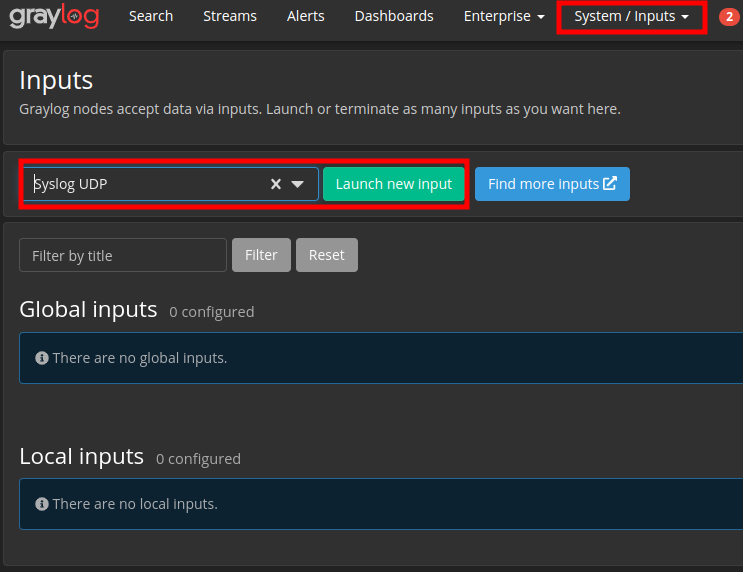
Navigate to System > Inputs > select Syslog UDP > click Launch New Input.
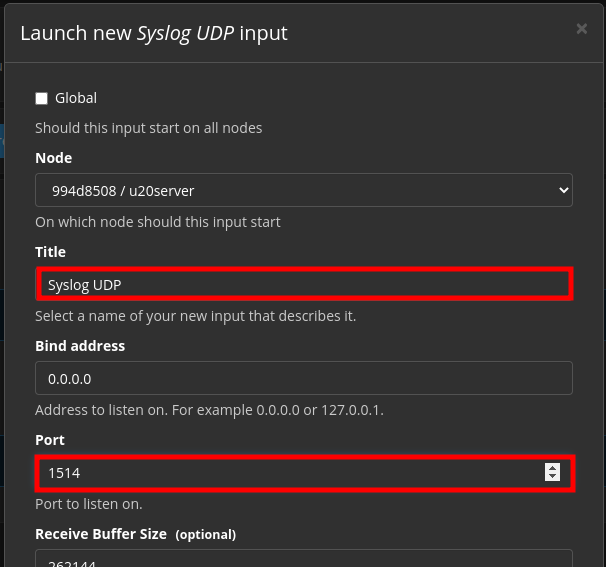
Give this Local Input a meaningful name and enter the port you want it to listen on:
Wait a few seconds until it shows the green indicator confirming it is Running.
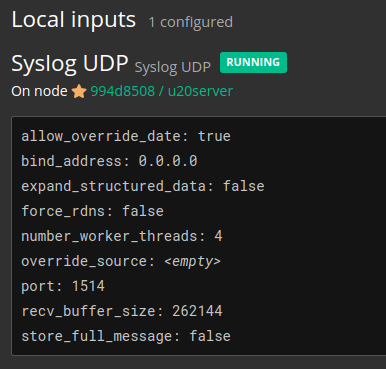
Your log server is now ready to receive log messages.
Create as many inputs as needed to cover all the requirements of your infrastructure.
Consider using a Log Relay Server depending on your network topology or other constraints.
CLIENT-SIDE: ANY LINUX HOST
Configure rsyslog to forward logs to the new Log Server (or to the nearest Log Relay Server):
sudo nano /etc/rsyslog.conf
Append this line to the configuration:
*.* @10.10.10.10:1514;RSYSLOG_SyslogProtocol23Format
Note: Use @ for UDP and @@ for TCP. Replace 10.10.10.10 with the IP address of your destination server.
Apply the changes and send a test log entry:
sudo systemctl restart rsyslog
echo "Log Event Test" | logger
NAVIGATING LOG ENTRIES
Navigate to Search and click the green Search button.
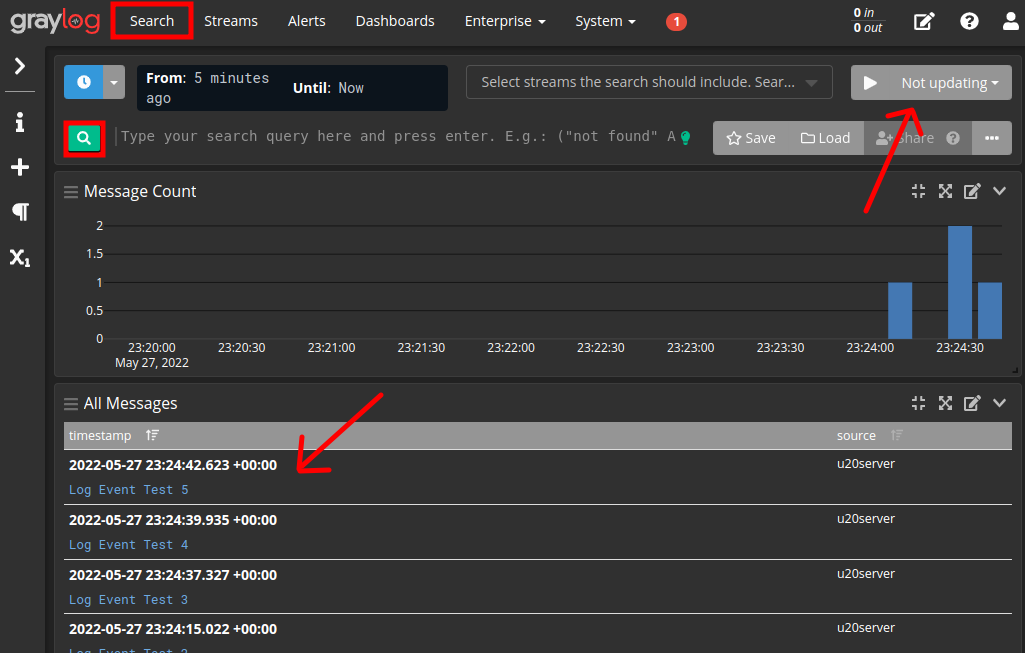
You should see the test log entries forwarded by rsyslog right away.
Select an auto-refresh frequency if you want to monitor incoming traffic in real time.
GrayLog’s search supports wildcards and RegEx. Examples:
- T??t
- Each question mark matches any single character.
- T*t
- The asterisk matches one or more characters.
- /[3-4]/
- Matches any character in the specified range.
BONUS
Read the post RegEx CheatSheet at [Link].
Read the post Linux Log Management and Audit [Link].