Python is a versatile, human-friendly scripting language and one of the most popular ones available today.
Its potential is virtually unlimited given the vast number of libraries freely available through package managers such as PIP.
Index of tricks in this post:
- Creating QR Codes
- Removing Background from Images
- HTTP Connections via Tor (Darkweb)
- Easy Graphic User Interface (GUI)
CREATING QR CODES
Install the segno dependency:
pip install segno
Once installed, import and use the library in your code:
import segno

qrcode = segno.make("Text to be encoded")
qrcode.save("fileName.png", dark="darkblue", light="white", border=5, scale=10)
qrcode.save("fileName.png", dark="darkblue", light=None, scale=10)
qrcode.terminal()


For RGB with Alpha Transparency using 8-digit notation:
qrcode.save("fileName.png", dark="ff000080", scale=10)

Note: In RGBA 8-digit notation, the first 6 digits represent the RGB value (from 000000 to FFFFFF), and the last 2 digits represent transparency (from 00 to FF, where 00 is fully opaque and FF is fully transparent). See more color notations in the Segno documentation [Link].
List of popular output formats (serializers):
- PNG
- Supports transparency.
- SVG
- Vectorized image with transparency.
- TXT
- No color or transparency support.
- PDF
- Transparency not supported.
- Streams/Buffers
- Capable of streaming output to a stream or buffer.
Outputting to a buffer (read more at [Link]):
import segno
import io
qrcode = segno.make("Text to be encoded")
buffer = io.BytesIO()
qrcode.save(buffer, kind='png')
print(buffer.getvalue())
API Endpoint / HTTP Server that responds with a QR Code:
#!/usr/bin/env python3
from http.server import SimpleHTTPRequestHandler
from socketserver import TCPServer
from urllib.parse import unquote
import segno
import io
def http_server(host_port):
class CustomHandler(SimpleHTTPRequestHandler):
def do_GET(self) -> None:
def send_200(content_type="application/json"):
self.send_response(200)
self.send_header("Content-type", content_type)
self.send_header("Cache-Control", 'no-cache, no-store, must-revalidate')
self.send_header("Pragma", 'no-cache')
self.send_header("Expires", '0')
self.end_headers()
self.path = unquote(self.path)
if self.path == '/' or self.path == '/qrcode.png':
if self.path == '/':
send_200('text/html')
self.wfile.write(bytes(' ', 'utf-8'))
elif self.path == '/qrcode.png':
send_200('image/jpeg')
qrcode = segno.make("Text to be encoded")
buffer = io.BytesIO()
qrcode.save(buffer, kind='png', scale=10)
self.wfile.write(bytes(buffer.getvalue()))
else:
return
return
else:
self.send_response(404)
self.end_headers()
return
class _TCPServer(TCPServer):
allow_reuse_address = True
httpd = _TCPServer(host_port, CustomHandler)
httpd.serve_forever()
try:
http_server(('0.0.0.0',8080))
except KeyboardInterrupt:
print(' Interrupted')
exit()
', 'utf-8'))
elif self.path == '/qrcode.png':
send_200('image/jpeg')
qrcode = segno.make("Text to be encoded")
buffer = io.BytesIO()
qrcode.save(buffer, kind='png', scale=10)
self.wfile.write(bytes(buffer.getvalue()))
else:
return
return
else:
self.send_response(404)
self.end_headers()
return
class _TCPServer(TCPServer):
allow_reuse_address = True
httpd = _TCPServer(host_port, CustomHandler)
httpd.serve_forever()
try:
http_server(('0.0.0.0',8080))
except KeyboardInterrupt:
print(' Interrupted')
exit()
Navigate to the following address in your browser:
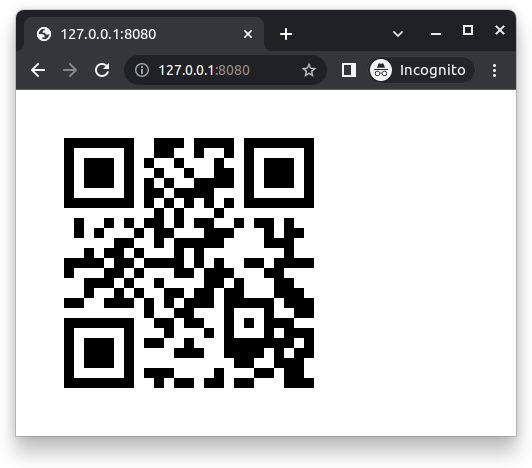
The terminal will log both requests:

REMOVING BACKGROUND FROM IMAGES
pip install rembg
OR (for GPU support)
pip install rembg[gpu]
Create the file rembg-app.py with the following content:
#!/usr/bin/python3
from rembg import remove
import sys

input_path = sys.argv[1]
output_path = sys.argv[2]

with open(input_path, 'rb') as i:
    with open(output_path, 'wb') as o:
        input = i.read()
        output = remove(input)
        o.write(output)
Make the script executable and run it as follows:
chmod +x rembg-app.py
./rembg-app.py input.png output.png
Alternatively, the following code produces the same result with simpler logic:
from rembg import remove
from PIL import Image

input_path = 'input.png'
output_path = 'output.png'

input = Image.open(input_path)
output = remove(input)
output.save(output_path)
Note: The rembg module can also be used directly from the command line: rembg i input.png output.png for a local file, rembg p input_dir output_dir for a local directory, or curl -s http://example.com/input.png | rembg i > output.png to pipe a remote file. It can also be started as an HTTP server with rembg s and called via curl "http://localhost:5000/?url=https://example.com/input.png" > output.png.
While some objects are not recognised perfectly, most are impressively extracted:

HTTP REQUEST VIA TOR NETWORK (DARKWEB)
curl 'https://api.ipify.org?format=txt'
The command above sends the request directly over the regular Internet, while the following routes it through Tor:
curl -x socks5h://127.0.0.1:9050 'https://api.ipify.org?format=txt'
The key is the use of a SOCKS5 proxy. The same approach is used in Python with the requests module.
Stem [Link] is a Python module that interacts with Tor’s ControlPort to gather connection metrics:
pip install stem
Edit the Tor configuration file:
sudo nano /etc/tor/torrc
Uncomment the following line to enable the ControlPort:
ControlPort 9051
Create a script with the following content:
#!/usr/bin/python3
import requests, time
from stem import Signal
from stem.control import Controller

# Set the headers for the request
headers = {'User-Agent': 'Mozilla/5.0 (Windows NT 10.0; Win64; x64) AppleWebKit/537.36 (KHTML, like Gecko) Chrome/70.0.3538.102 Safari/537.36'}
PROXIES = {
    'http': 'socks5://127.0.0.1:9050',
    'https': 'socks5://127.0.0.1:9050'
}

# Initialize the controller for the Tor network
with Controller.from_port(address='127.0.0.1', port=9051) as controller:
    controller.authenticate()

    url = 'https://api.ipify.org?format=txt'

    print('Public IP used for the request:')
    while True:
    # Set the new IP address
        controller.signal(Signal.NEWNYM)
        response = requests.get(url, headers=headers, proxies=PROXIES)
        print('IP:', str(response.content, 'utf-8'), '-', controller.get_info("traffic/read"), 'bytes received -', controller.get_info("traffic/written"), 'bytes sent.')
        time.sleep(10)
Start Tor in one terminal and leave it running:
tor
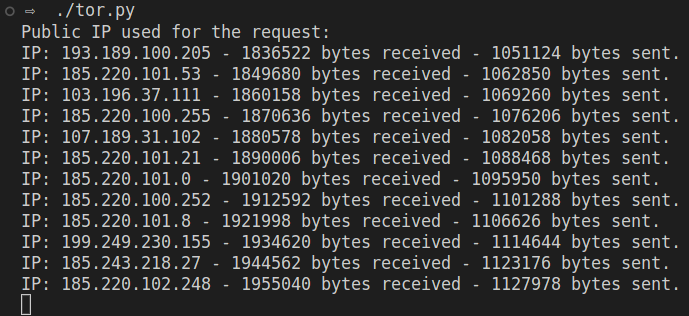
In a second terminal, run the script. The output will show the Tor exit node’s IP used to reach the regular Internet, along with the total bytes sent and received.
EASY GRAPHIC USER INTERFACE
Install the required modules:
sudo apt-get install python3-tk -y
pip install easygui
Create a script with the following content:
#!/usr/bin/python3
import easygui
read_file_path = easygui.fileopenbox(title='Select file')
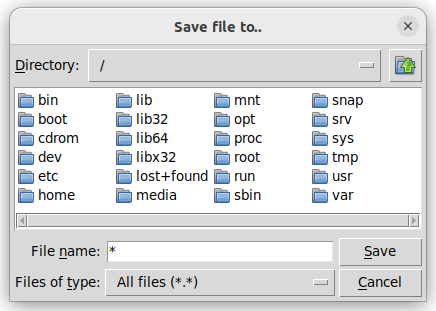
write_file_path = easygui.filesavebox(title='Save file to...')
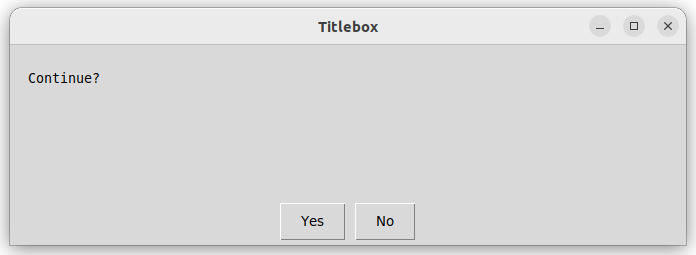
prompt_question = easygui.ynbox('Continue?', 'Titlebox', ('Yes', 'No'))
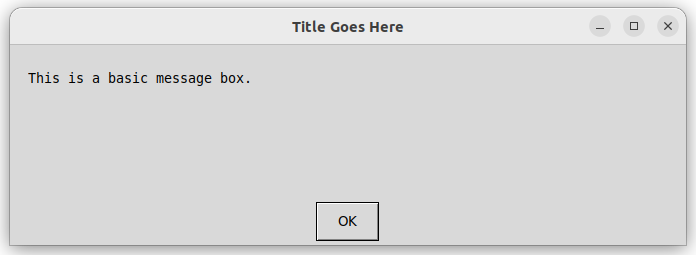
message_box = easygui.msgbox('This is a basic message box.', 'Title Goes Here')
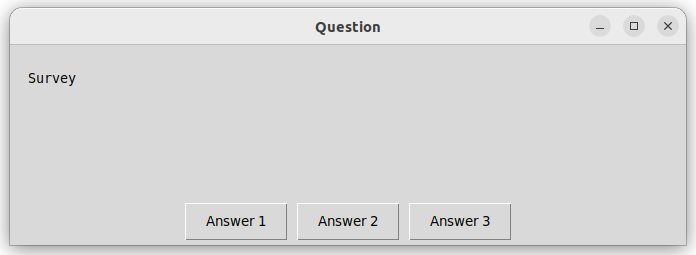
selected_option = easygui.buttonbox('Survey', 'Question', ('Answer 1', 'Answer 2', 'Answer 3'))
The following pop-up windows may appear. Their appearance may vary depending on your operating system or desktop environment.

ARGUMENT PARSING
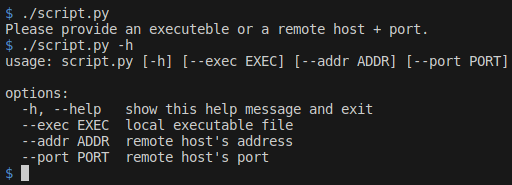
When running a script, it is common to pass arguments in a specific order and access them by index. The argparse library handles arguments in any order, validates types, assigns default values, and generates a help menu automatically.
- Optional
#!/usr/bin/python3
import argparse

parser = argparse.ArgumentParser()
parser.add_argument('--exec', type=str, help="local executable file")
parser.add_argument('--addr', type=str, help="remote host's address")
parser.add_argument('--port', type=int, help="remote host's port")
args = parser.parse_args()

if args.exec != None:
    print('Execute:', args.exec)
elif args.addr != None and args.port != None:
    print('Connect to:', args.host, 'on port:', args.port)
else:
    print('Please provide an executable or a remote host + port.')
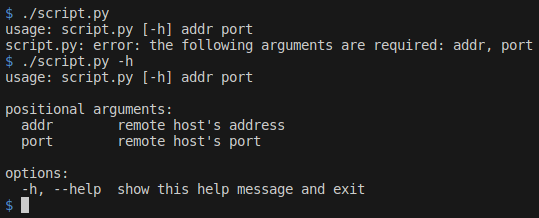
- Positional
#!/usr/bin/python3
import argparse

parser = argparse.ArgumentParser()
parser.add_argument('addr', type=str, help="remote host's address")
parser.add_argument('port', type=int, help="remote host's port")
args = parser.parse_args()

print('Connect to:', args.host, 'on port:', args.port)
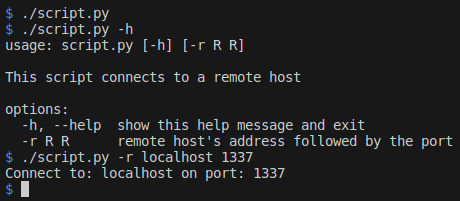
- Multiple Arguments
#!/usr/bin/python3
import argparse

parser = argparse.ArgumentParser(description="This script connects to a remote host")
parser.add_argument('-r', type=str, nargs=2, help="remote host's address followed by the port")
args = parser.parse_args()

if args.r is not None:
    print('Connect to:', args.r[0], 'on port:', args.r[1])
Additional available options:
- required=True
- Makes an argument mandatory.
- default=0
- Sets a default value if the argument is not provided.
- nargs=’*’
- Allows any number of arguments.
- choices=[‘local’, ‘remote’]
- Limits the accepted values.
- action=’store_true’
- Treats the argument as a boolean flag, defaulting to false if not provided.
PRETTY PRINT
The pprint module formats data structures such as objects, arrays, and dictionaries for easier reading.
from pprint import *
object = {"object":'chair',"quantity":2,"colors": ["red", "white", "blue"]}
pprint(object, depth=1, width=10)
PROGRESS BAR
tqdm adds a smart progress meter to any loop. Simply wrap any iterable with tqdm(iterable).
from tqdm import tqdm
import time
for i in tqdm(range(10000), desc="Processing"):
    time.sleep(0.0001)

SENDING EMAILS VIA SMTP
#!/usr/bin/python3
import smtplib
from email.mime.text import MIMEText

def send_email(server, port, email, password, recipient, subject, body):
  try:
    message = MIMEText(body)
    message["From"] = email
    message["To"] = recipient
    message["Subject"] = subject
    with smtplib.SMTP(server, port) as smtp_server:
      smtp_server.sendmail(email, recipient, message.as_string())
    print("Email sent successfully!")
  except Exception as e:
    print(f"Could not send email using server {server} and port {port}. Error: {e}")

send_email(server="smtp.example.com", port=25, email="[email protected]", password="", recipient="[email protected]", subject="Test Email", body="This is a test email.")
COMPILING CODE
Python can be compiled into machine code using Nuitka [Link], which produces a binary with no readable strings. This enables:
- Intellectual property protection
- Increased performance
- Optionally, Standalone or OneFile mode to:
- Bundle the Python runtime inside the executable
- Embed all dependencies and libraries
These features are particularly useful for building lean microservices with CI/CD pipelines.
Installation:
sudo apt install patchelf python3-pip python3-venv -y
python3 -m venv .venv
source .venv/bin/activate
python3 -m pip install -U "Nuitka[all]"
Building:
python3 -m nuitka app.py
OR
python3 -m nuitka --mode=standalone app.py
OR
python3 -m nuitka --mode=onefile --follow-imports app.py
The standard build requires Python and all dependencies to be installed on the target system, while Standalone produces a .dist directory that can be copied and run on any compatible host.