OpenWrt [Link] is an open-source lightweight firmware originally created for embedded devices such as routers and network-attached storage devices.
Running OpenWrt in a container (such as LXC) offers several benefits:
- Better resource isolation and management
- Shares the kernel with the host for optimal resource usage
- Easy to back up, migrate, and clone
- Isolates the firmware from the host system and its guests
Proxmox is an open-source hypervisor that manages containers much like virtual machines, making it a great foundation for running OpenWrt.
This post walks through installing OpenWrt as a container (CT) in Proxmox. See more about Proxmox at [Link] and a cheat-sheet at [Link].
DOWNLOADING THE LXC TEMPLATE
Navigate to https://us.lxd.images.canonical.com/images/openwrt/ and find the latest build, for example …/22.03/amd64/default/20230121_11:58/rootfs.tar.xz.
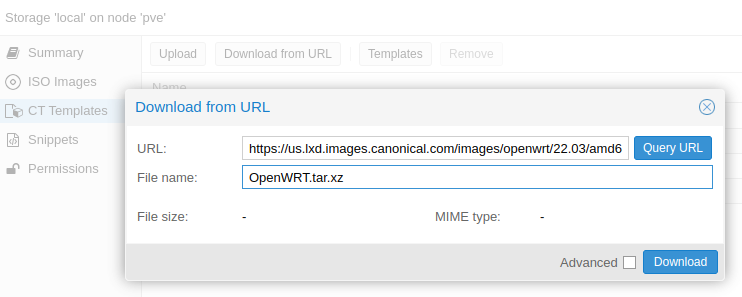
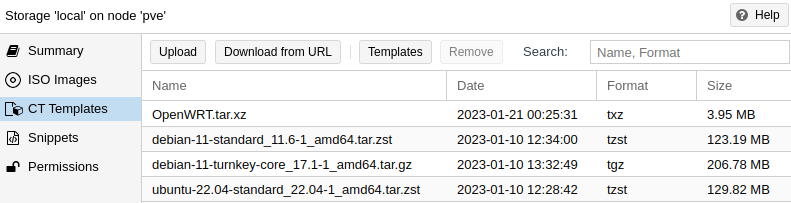
INSTALLING VIA CLI
Open the Proxmox host shell and run the following command, customizing it as needed:
ct create 999 /var/lib/vz/template/cache/OpenWRT.tar.xz --arch amd64 --hostname OpenWrt --rootfs local-lvm:999 --memory 1024 --cores 2 --ostype unmanaged --unprivileged 1
The container ID must be unique. Choose a storage location with at least 30 GB available.
CONFIGURING THE CONTAINER’S NETWORK
The container needs at least 2 network interfaces from the host.
By default, the bridge interface vmbr0 is created during installation. If needed, create a second Linux Bridge interface as follows:
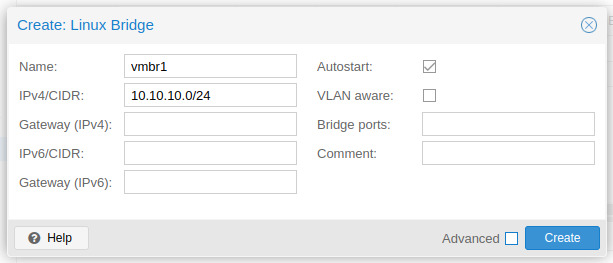
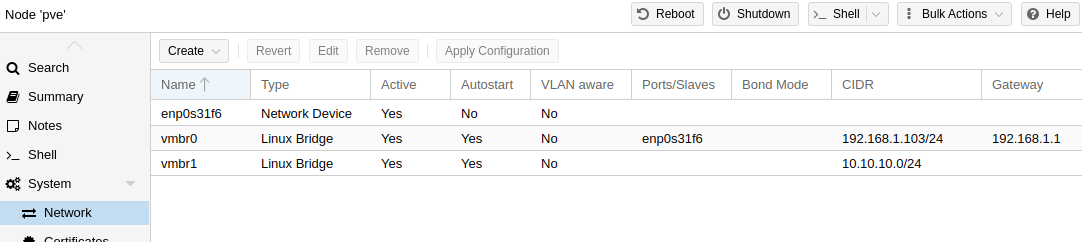
In the container’s network configuration, add both bridge networks:
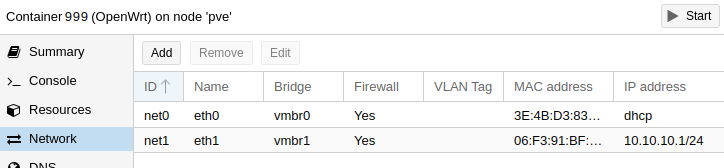
The container can now be started.
BASIC SYSTEM AND FIREWALL CONFIGURATION
Open the container console and immediately change the root password:
passwd
Then check the IP assigned to the WAN interface eth0:
ip a
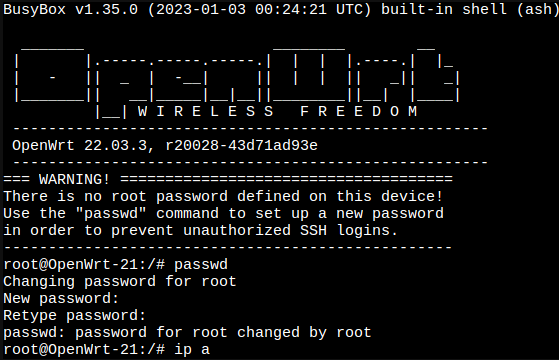
Edit the firewall configuration:
vim /etc/config/firewall
Add the following lines right after the “Allow-Ping” block:
config rule
        option name             LUCI-on-WAN
        option src              wan
        option proto            tcp
        option family           ipv4
        option dest_port        80
        option target           ACCEPT
Then reload the firewall to apply the changes:
/etc/init.d/firewall reload
ACCESSING THE LUCI WEB UI
Navigate to http://192.168.1.180.
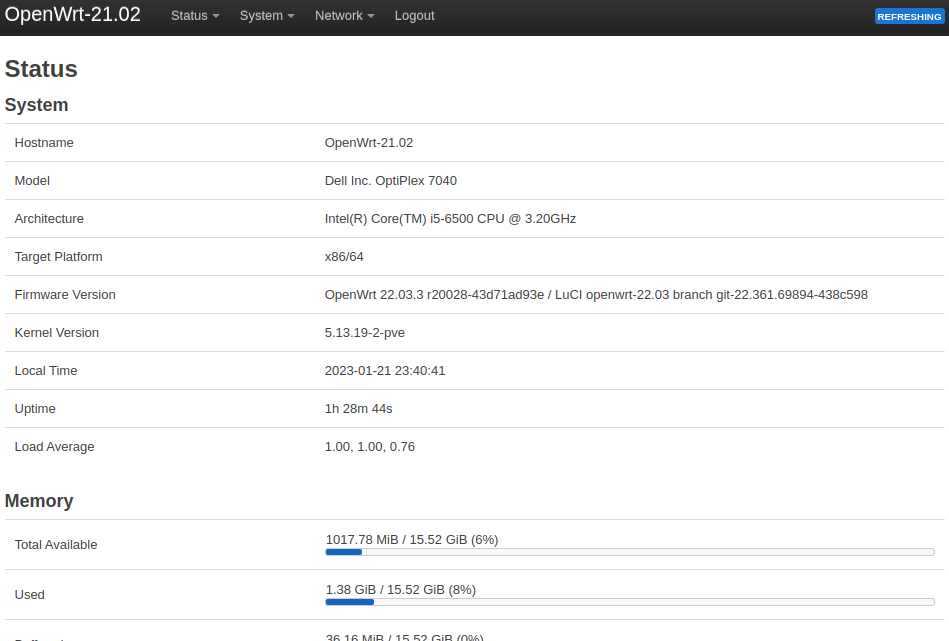
Go to Network > Interfaces > “Add new interface…”
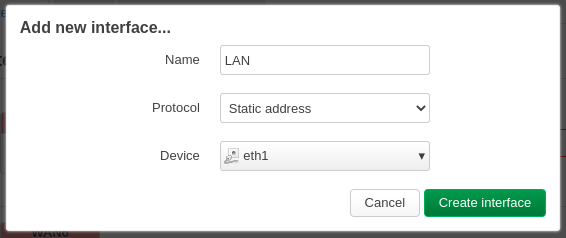
On the General Settings tab, set the IP to 10.10.10.1 and mask to 255.255.255.0.
On the Firewall Settings tab, select the zone “lan“.
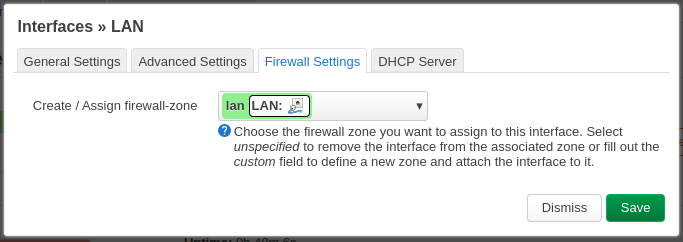
Enable the DHCP server, then click “Save“.
Optionally, remove WAN6 if it is not needed.
Click “Save & Apply“. It will take a few seconds for the router (OpenWrt) to reload.
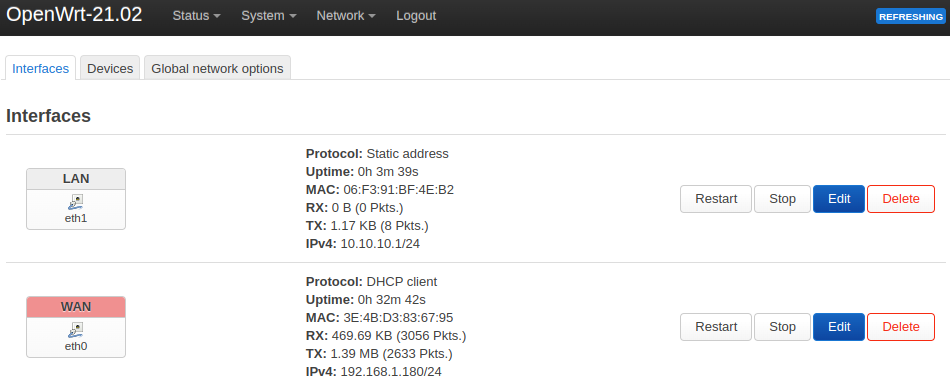
CONCLUSION
By attaching virtual machines and containers to the vmbr1 interface, they will all be isolated and protected by the OpenWrt router and its firewall rules.
BONUS: OPENVPN CLIENT AND SERVER
Connect to the OpenWrt CT via SSH or the Console, then run:
opkg update
opkg install luci-app-openvpn openvpn-openssl
Note: OpenWrt officially transitioned its default package manager from opkg to apk (Alpine Package Keeper) in late 2024. The equivalent commands for modern systems are:
apk update
apk add luci-app-openvpn openvpn-openssl
OR
apk --update-cache add luci-app-openvpn openvpn-openssl
Use --simulate for a dry run, which is especially useful when removing packages with del.
Refresh the web UI and a new VPN option will appear in the top menu:
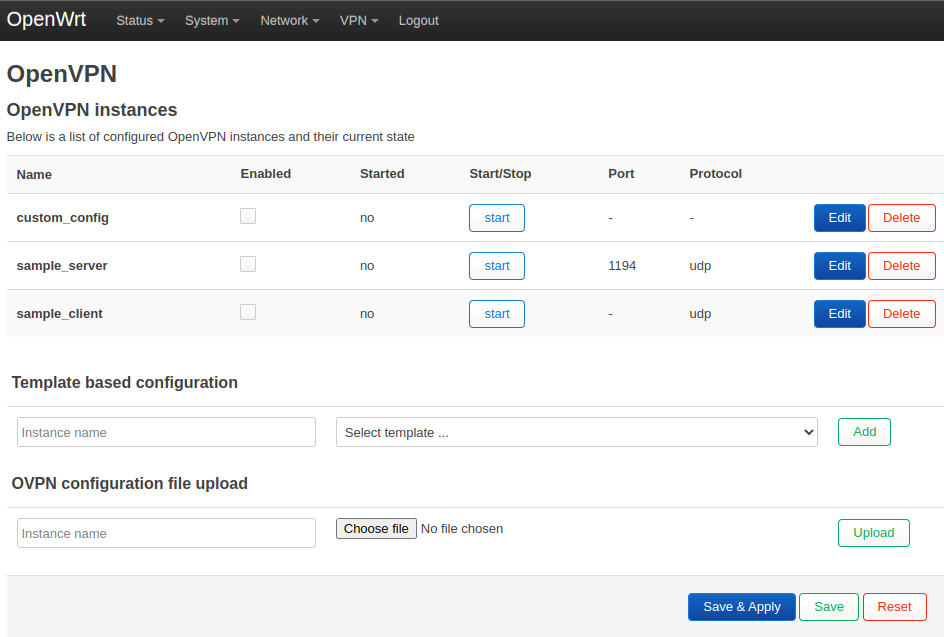
Configure and enable your VPN parameters. It will not work out of the box. Shut down the CT and connect to the Proxmox host via SSH or the Console to edit the CT configuration:
nano /etc/pve/lxc/103.conf
Make the necessary adjustments to include the highlighted configuration parameters:
arch: amd64
cores: 2
features: nesting=1
hostname: OpenWrt
memory: 1024
net0: name=eth0,bridge=vmbr0,firewall=1,hwaddr=3E:4B:D3:83:67:95,ip=dhcp,type=veth
net1: name=eth1,bridge=vmbr1,firewall=1,hwaddr=06:F3:91:BF:4E:B2,ip=10.10.10.1/24,type=veth
ostype: unmanaged
rootfs: Storage:103/vm-103-disk-0.raw,size=103G
swap: 512
unprivileged: 1
lxc.cgroup2.devices.allow: c 10:200 rwm
lxc.mount.entry: /dev/net dev/net none bind,create=dir
Then allow unprivileged containers to access the host’s virtual network resources (see before and after), and start the CT again:
ls -l /dev/net/tun
chown 100000:100000 /dev/net/tun
ls -l /dev/net/tun
pct start 103
From the CT console, check whether a new interface (tun0) appears:
ip a
The VPN tunnel may be up and reachable from the OpenWrt server, but LAN clients will not have internet access yet.
Go back to the web UI and navigate to Network > Interfaces > “Add new interface…”
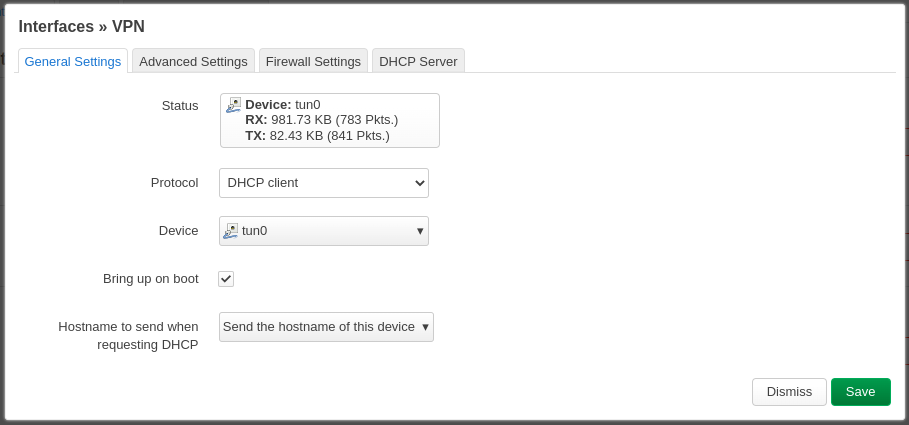
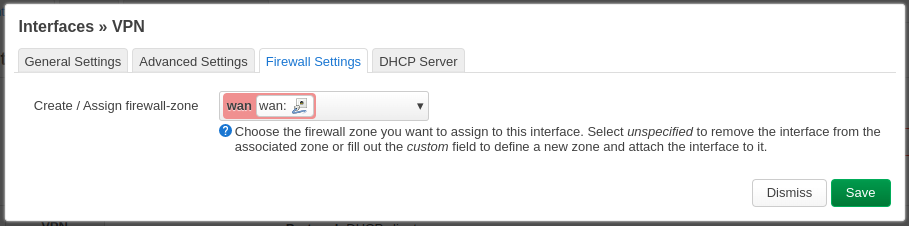
Edit the new interface and on the Firewall Settings tab, assign it to the WAN firewall zone.
Ping an external address to test connectivity, and also verify DNS resolution. If your OpenVPN configuration includes “block-outside-dns”, DNS queries outside the tunnel will be blocked to prevent leaks. In that case, consider using a custom DNS server instead.