There are many mature DNS services, such as unbound, dnsmasq, and bind9, but some may argue that PowerDNS is the most modern and flexible implementation [Link].
PowerDNS has 4 basic components:
- DNSDist
- It is a DNS-aware load balancer that sits in front of your actual DNS servers (like the Recursor or Authoritative) to accept incoming traffic, inspect it, and decide exactly where it should go or should be dropped (if deemed malicious or exceeded a rate limit).
- Recursor
- It is a caching resolver that recursively reaches the Internet’s root servers and top-level domains to find the answers. It does not host any zone.
- Authoritative Server
- It is responsible for hosting zones, with definitive records for a specific domain. It does not respond to any request for zones that it does not own.
- Backend
- The so-called backend, in this context, is how the Authoritative Server stores the records (e.g., MySQL, PostgreSQL, or BIND zone files).
Note: The Authoritative Server holds no data itself (stateless), all data lives in the database (the state). To make it highly available, just connect multiple server instances to that same Backend (a database cluster, Galera, or a replicated setup, etc).
INTERNAL DNS SERVICE

For this example, a DNS service will be deployed to serve an internal network (aka LAN). It will have a layer of protection and a recursive resolver behind it. Feel free to deploy multiple instances for greater resilience and fault tolerance as necessary.
Installing DNSDist on Debian-based distros.
echo 'deb [signed-by=/etc/apt/keyrings/dnsdist-20-pub.asc] http://repo.powerdns.com/ubuntu noble-dnsdist-20 main' | tee /etc/apt/sources.list.d/pdns.list
sudo install -d /etc/apt/keyrings; curl https://repo.powerdns.com/FD380FBB-pub.asc | sudo tee /etc/apt/keyrings/dnsdist-20-pub.asc
sudo apt update
sudo apt-get install -y dnsdist -y
sudo sed -i 's/^#\?DNSStubListener=.*/DNSStubListener=no/' /etc/systemd/resolved.conf
sudo sed -i 's/^#\?DNS=.*/DNS=127.0.0.1/' /etc/systemd/resolved.conf
sudo systemctl restart systemd-resolved
sudo nano /etc/dnsdist/dnsdist.conf
-- dnsdist configuration file, an example can be found in /usr/share/doc/dnsdist/examples/
-- disable security status polling via DNS.
setSecurityPollSuffix("")
-- Bind to any interface on port 53 (both IPv4 and IPv6).
setLocal("0.0.0.0:53")
addLocal("[::]:53")
-- Allow requests from any address (IPv4 and IPv6).
addACL("0.0.0.0/0")
addACL("::/0")
-- Define your backend DNS server(s) that dnsdist will forward traffic to.
newServer({address="1.1.1.1", qps=1000})
Note: The example above is over-permissive for demonstration purposes and shall be tailored/locked down to the network requirements. Refer to /usr/share/doc/dnsdist/examples/dnsdist.conf for more examples.
sudo dnsdist --check-config
sudo systemctl restart dnsdist
Test it!
dig google.com @127.0.0.1 +noall +answer
On another instance…
Installing Recursor on Debian-based distros.
echo 'deb [signed-by=/etc/apt/keyrings/rec-54-pub.asc] http://repo.powerdns.com/ubuntu noble-rec-54 main' | tee /etc/apt/sources.list.d/pdns.list
sudo install -d /etc/apt/keyrings; curl https://repo.powerdns.com/FD380FBB-pub.asc | sudo tee /etc/apt/keyrings/rec-54-pub.asc
sudo apt-get update
sudo apt-get install pdns-recursor -y
sudo sed -i 's/^#\?DNSStubListener=.*/DNSStubListener=no/' /etc/systemd/resolved.conf
sudo sed -i 's/^#\?DNS=.*/DNS=127.0.0.1/' /etc/systemd/resolved.conf
sudo systemctl restart systemd-resolved
sudo nano /etc/powerdns/recursor.conf
Updates the following blocks.
dnssec:
  # validation: process # default
  trustanchorfile: /usr/share/dns/root.key
recursor:
  hint_file: /usr/share/dns/root.hints
  include_dir: /etc/powerdns/recursor.d
  security_poll_suffix: ''
#  forward_zones_recurse:
#    - zone: .
#      forwarders:
#        - 1.1.1.1
#        - 8.8.8.8
#    - zone: example.internal
#      forwarders:
#        - 192.168.10.10
incoming:
  listen:
    - 0.0.0.0
  allow_from:
    - 0.0.0.0/0
outgoing:
 # source_address:
 # - 0.0.0.0 # default
Note: It is also over-permissive and needs to be secured appropriately to suit the environment’s needs. There are also examples to forward to an external resolver and for an internal zone, if that is the case.
sudo systemctl restart pdns-recursor
Test it!
dig google.mx @127.0.0.1 +noall +answer
If everything works, change DNSDist that was configured and tested with 1.1.1.1 to forward to Recursor.
sudo sed -i 's/1\.1\.1\.1/192\.168\.10\.20/' /etc/dnsdist/dnsdist.conf
sudo dnsdist --check-config
sudo systemctl restart dnsdist
HOSTING DNS ZONES

Compared to the example above, in this case a real zone such as example.com needs to be publicly exposed.
This example will have a layer of protection (using DNSDist again) and an Authoritative Nameserver behind it. Feel free to deploy multiple instances for greater resilience and fault tolerance as necessary.
Install DNSDist with the same steps demonstrated before.
On another instance…
Installing Authoritative Server on Debian-based distros.
echo 'deb [signed-by=/etc/apt/keyrings/auth-51-pub.asc] http://repo.powerdns.com/ubuntu noble-auth-51 main' | tee /etc/apt/sources.list.d/pdns.list
sudo install -d /etc/apt/keyrings; curl https://repo.powerdns.com/FD380FBB-pub.asc | sudo tee /etc/apt/keyrings/auth-51-pub.asc
sudo apt-get update
sudo apt-get install pdns-server -y
sudo grep -E -v '^(#|$)' /etc/powerdns/pdns.conf
The output of this command defines what Backend strategy the server is configured to use. For the sake of learning, this is how to configure to use Bind9 files for zones.
sudo nano /etc/powerdns/named.conf
Append the configuration file with a reference to the new zone.
zone "example.com" {
    type master;
    file "/etc/powerdns/zones/example.com.zone";
};
Then, create the file with the records for the new zone.
sudo mkdir -p /etc/powerdns/zones
sudo nano /etc/powerdns/zones/example.com.zone
Add the following content.
$TTL 3600
@   SOA ns1.example.com. admin.example.com. 1 10800 3600 604800 86400

@   NS  ns1.example.com.
@   NS  ns2.example.com.

ns1 A   192.0.2.1
ns2 A   192.0.2.2

@   A   192.0.2.10
www A   192.0.2.10
-
- Administrator (
admin.example.com.)- The notation that represents the email of the administrator of this zone
[email protected](@is not allowed, so a.is used).
- The notation that represents the email of the administrator of this zone
- Serial (
1)- The version number of your zone file. When any record is changed, it must increment this number, or secondary servers won’t notice the update.
- Refresh (
10800)- 3 hours (in seconds). How often the Secondary DNS servers ask your master server if the Serial number has gone up.
- Retry (
3600)- 1 hour (in seconds). If a secondary server tries to check the master and fails, this is how long it waits before trying again.
- Expire (
604800)- 1 week (in seconds). If your master server goes completely offline, secondary servers will keep answering for your domain for this long before giving up and assuming the data is too old to trust.
- Minimum (
86400)- 1 day (in seconds). This controls “negative caching.” If someone asks for a record that doesn’t exist (like fake.example.com), internet routers will remember that it doesn’t exist for 1 day, saving your server from being hammered with identical bad requests.
- Administrator (
These parameters are responsible for the dreaded “DNS propagation” delay. In fact, nothing really propagates at all. What these numbers define is how long answers are cached along the way. Consider using shorter periods to reflect changes more quickly between servers and resolvers.
Restart the Authoritative Server to load the configuration.
sudo systemctl restart pdns
Test it!
dig example.com A @127.0.0.1 +noall +answer
dig www.example.com A @127.0.0.1 +noall +answer
dig example.com NS @127.0.0.1 +noall +answer
dig ns1.example.com A @127.0.0.1 +noall +answer
dig ns2.example.com A @127.0.0.1 +noall +answer
dig example.com SOA @127.0.0.1
Next time changes are done to this zone, reload the configuration without restarting the service.
sudo pdns_control bind-reload-now example.com
Back to the DNSDist instance…
Define a routing rule (Policy) that sends requests matching example.com to the Authoritative Server as a new backend pool.
echo 'newServer({address="192.168.10.10", pool="internal-pool", qps=1000})' | tee -a /etc/dnsdist/dnsdist.conf
echo 'addAction("example.com.", PoolAction("internal-pool"))' | tee -a /etc/dnsdist/dnsdist.conf
sudo systemctl restart dnsdist
Test it!
dig example.com @127.0.0.1
USING MYSQL AS THE BACKEND
This tutorial will not explain how to deploy any type of database clusterization or replication because that is already covered in other posts.
Install MySQL server with the following command. Alternatively, MariaDB or PostgreSQL would be great alternatives too.
sudo apt install mysql-server pdns-backend-mysql -y
Note: The example above is installing the DB on the same instance of the Authoritative Server for simplification.
sudo mysql -u root
Create the database and service account.
mysql> CREATE DATABASE powerdns CHARACTER SET utf8mb4 COLLATE utf8mb4_unicode_ci;
mysql> CREATE USER 'pdns_user'@'localhost' IDENTIFIED BY 'your_secure_password';
mysql> GRANT ALL PRIVILEGES ON powerdns.* TO 'pdns_user'@'localhost';
mysql> FLUSH PRIVILEGES;
mysql> EXIT;
Load the database schema.
sudo mysql -u pdns_user -p powerdns < /usr/share/doc/pdns-backend-mysql/schema.mysql.sql
mysql -u pdns_user -p -e 'SHOW TABLES;' powerdns
Remove the Bind9 configuration and load the MySQL.
sudo rm -f /etc/powerdns/pdns.d/bind.conf
sudo nano /etc/powerdns/pdns.d/gmysql.conf
Add the following content.
# Launch the gmysql backend engine
launch=gmysql

# Database connection parameters
gmysql-host=127.0.0.1
gmysql-port=3306
gmysql-dbname=powerdns
gmysql-user=pdns_user
gmysql-password=password
gmysql-dnssec=yes
Protect the file and restart the Server.
sudo chmod 640 /etc/powerdns/pdns.d/gmysql.conf
sudo chown root:pdns /etc/powerdns/pdns.d/gmysql.conf
sudo systemctl restart pdns
Test it!
dig example.com @127.0.0.1
You might have an empty response as a successful request because the zone is not present. A failed tentative will timeout.
MANAGING ZONES
sudo pdnsutil create-zone example.com
sudo pdnsutil clear-zone example.com
sudo pdnsutil add-record example.com example.com SOA "ns1.example.com. admin.example.com. 1 10800 3600 604800 86400"
sudo pdnsutil add-record example.com example.com NS ns1.example.com
sudo pdnsutil add-record example.com example.com NS ns2.example.com
sudo pdnsutil add-record example.com ns1.example.com A 192.0.2.1
sudo pdnsutil add-record example.com ns2.example.com A 192.0.2.2
sudo pdnsutil add-record example.com example.com A 192.0.2.10
sudo pdnsutil add-record example.com www.example.com A 192.0.2.10
sudo pdnsutil list-zone example.com
sudo pdnsutil set-kind example.com master
Test it!
dig www.example.com @127.0.0.1
USING THE WEB GUI
On the Authoritative Server, edit the PowerDNS once more to enable the Web Server and the API.
sudo nano /etc/powerdns/pdns.conf
api=yes
api-key=A_SUPER_SECRET_API_KEY_FOR_EXAMPLE_A_UUID
webserver=yes
webserver-address=0.0.0.0
webserver-allow-from=0.0.0.0/0,::/0
webserver-port=8081
Note: The example above is EXTREMELY over-permissive and needs to be secured appropriately to suit the environment’s needs.
sudo systemctl restart pdns
Navigate to http://192.168.10.10:8081/ (replace with your IP).
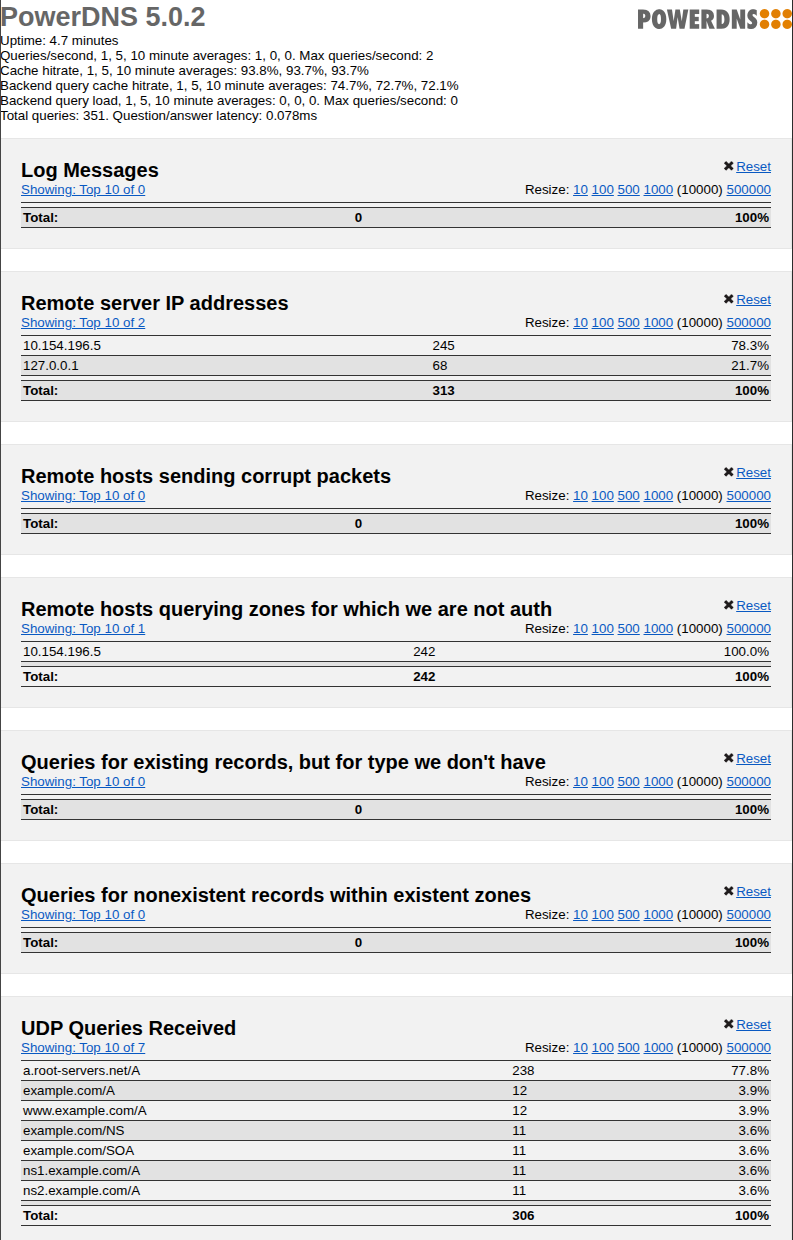
PowerDNS can also be monitored with Prometheus via http://192.168.10.10:8081/metrics.
Even though it presents an enormous amount of information and valuable metrics, PowerDNS does not have an official Admin Dashboard-like service.
There are well-known frontend apps that can be used for eventually managing zones, such as PowerDNS-Admin [Link].
sudo docker run -d --name powerdns-admin -e SECRET_KEY='A_SUPER_SECRET_API_KEY_FOR_EXAMPLE_A_UUID' -v pda-data:/data -p 127.0.0.1:9191:80 powerdnsadmin/pda-legacy:latest
For reference, the following commands stop and start the container.
docker stop powerdns-admin
docker start powerdns-admin
Navigate to http://127.0.0.1:9191/
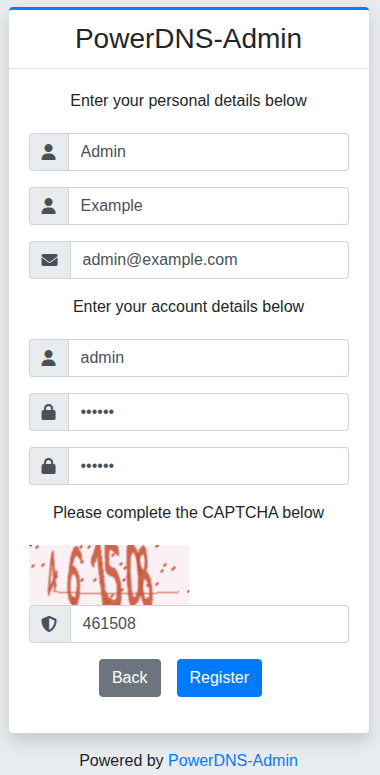
Click on Create an account.
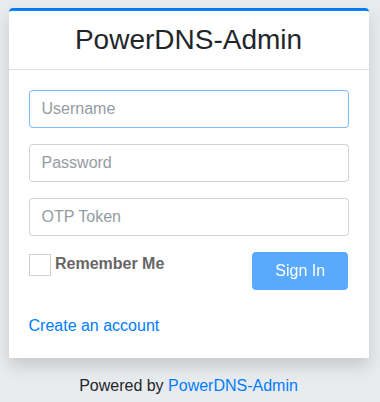
Then, log in as this account. The first one will have Admin privileges automatically.
Enter the URL for the Authoritative Server (e.g, http://192.168.10.10:8081/) and the API Key.
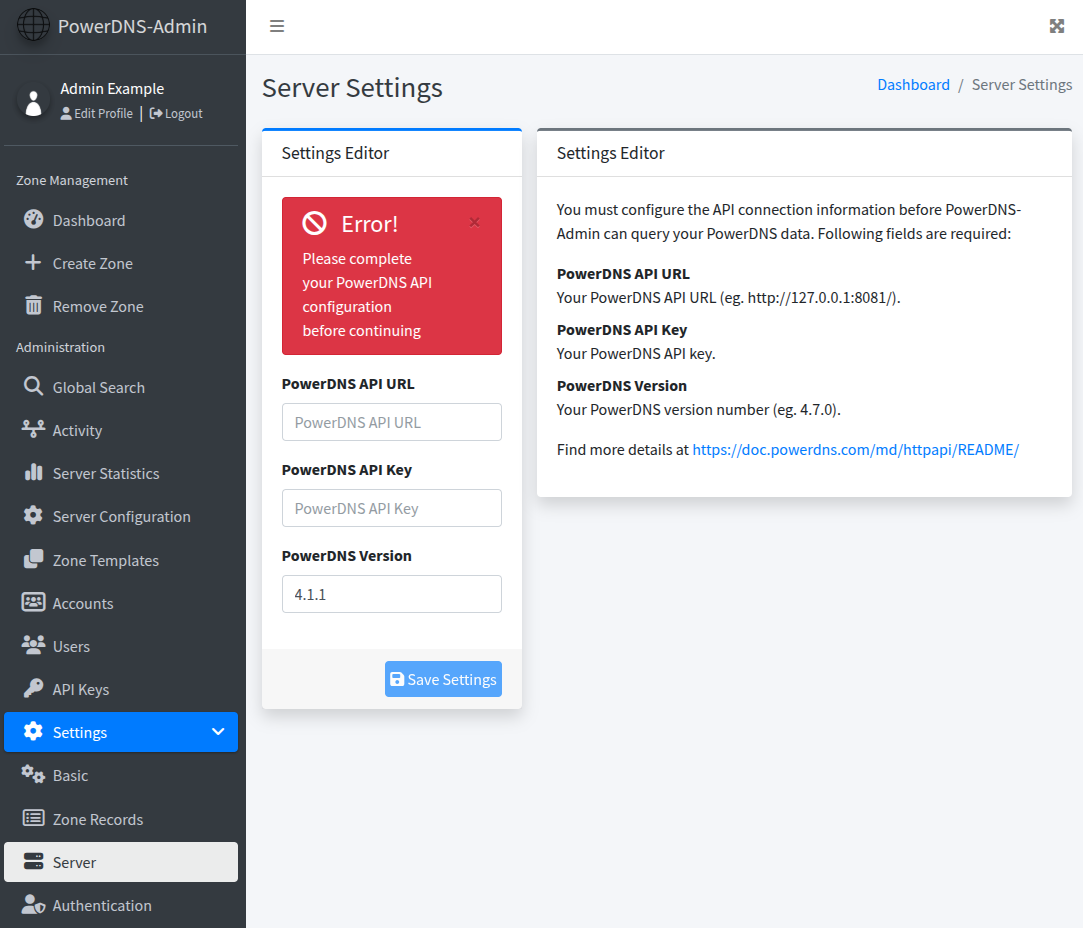
On the left menu, there will be options to create, remove, and manage Zones.
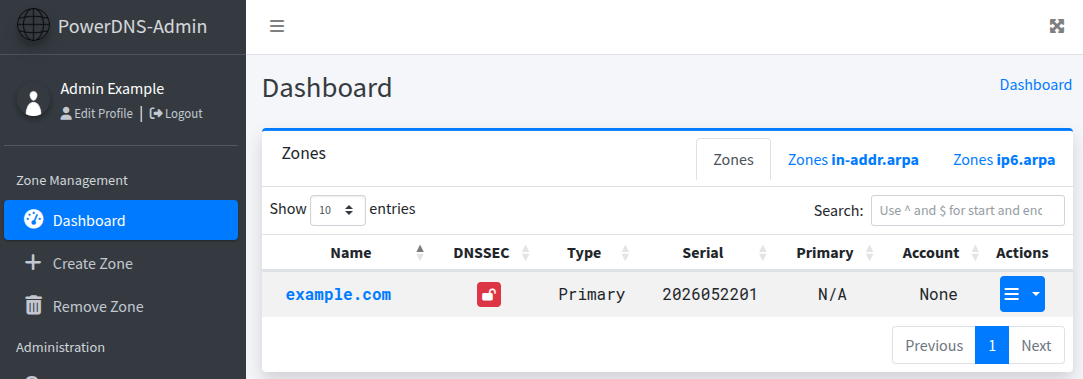
Click on a zone to manage its records.
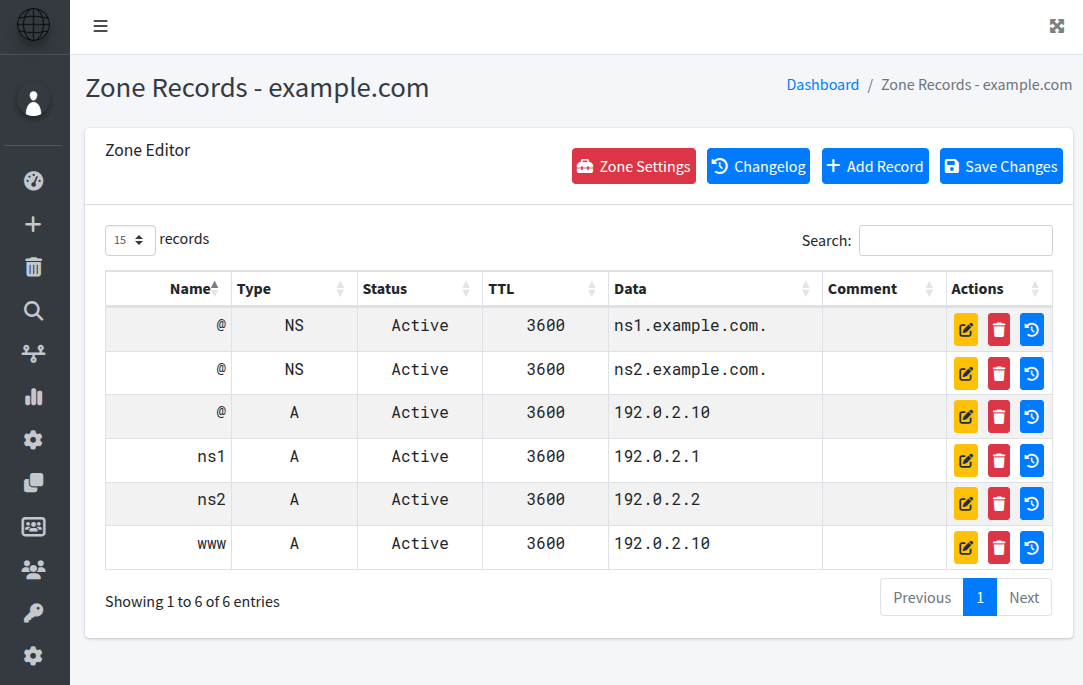
It is all intuitive and self-explanatory.
Consider using a reverse proxy with TLS termination for encrypted traffic to the GUI and API.
DNS VALIDATION TLS CERTIFICATE
To issue TLS certificates with DNS Challenge via ACME protocol (acme.sh or certbot), use the following method.
export PDNS_Url="http://192.168.10.10:8081"
export PDNS_Key="A_SUPER_SECRET_API_KEY_FOR_EXAMPLE_A_UUID"
acme.sh --issue --dns dns_pdns -d example.com -d www.example.com
Another way is to use PowerDNS-Admin as an API Proxy with RBAC by creating keys with minimal permissions and limited access to specific zones.
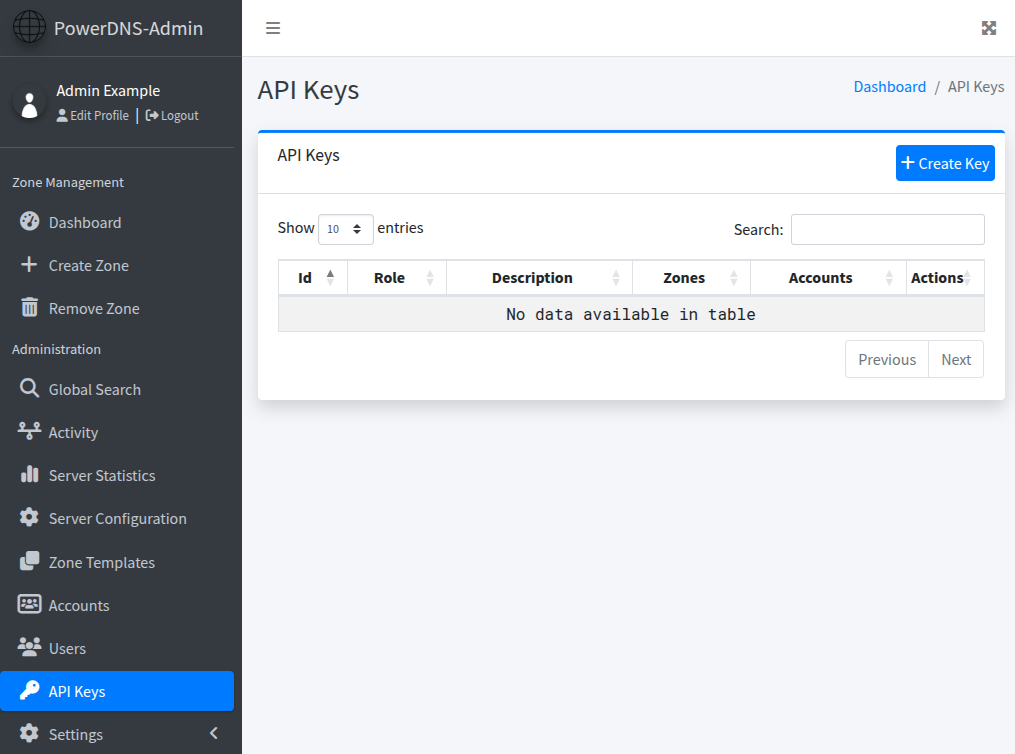
This allows granular control of keys per client/consumer, limiting the risk of exposure and facilitating rotation when necessary.
REFLECTIONS
This post was designed to set the foundation for the basic concepts for two scenarios: recursive name resolution and authoritative zones.
In the second post, architectural designs for a geographically fault-tolerant and highly available service will be covered.
A third post will cover security aspects, such as tampering resistance and encryption.