For an enthusiast, it’s a whole universe of exploration, privacy, anti-censorship, and more.
The most popular sources for models are:
- llama.cpp
- A highly optimized C/C++ implementation designed to run LLMs locally. [Link]
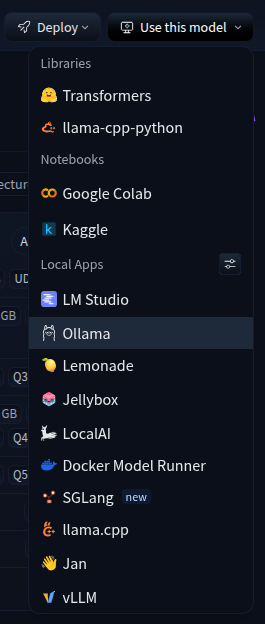
- Ollama [Link]
- A lightweight, extensible framework for running LLMs locally.
- Hugging Face [Link]
- The primary model hub for AI enthusiasts and researchers.
- LocalAI [Link]
- A containerized AI stack with a web UI, compatible with the OpenAI API.
Tip
The following websites can test and benchmark whether your computer can run an LLM, and how well.
LLAMA.CPP
Download a model from HuggingFace.
llama-cli -hf Qwen/Qwen2.5-Coder-7B-Instruct-GGUF
Launch an OpenAI-compatible API server (port 8080 by default).
llama-server -hf Qwen/Qwen2.5-Coder-7B-Instruct-GGUF
Or
llama-server -m model.gguf --host 0.0.0.0 --port 9000
Inspect and verify a model file’s metadata and architecture.
llama-cli -m model.gguf --info
Start a continuous conversation.
llama-cli -m model.gguf -cnv
OLLAMA
Installing Ollama:
curl -fsSL https://ollama.com/install.sh | sh
Pulling coder models.
ollama pull deepseek-coder:1.3b
ollama pull qwen2.5-coder:1.5b-base
ollama pull qwen2.5-coder:3b
ollama pull deepseek-coder:6.7b
ollama pull codellama:7b
ollama pull qwen2.5-coder:7b
ollama pull yi-coder:9b
ollama pull qwen2.5-coder:14b
Running a specific model.
ollama run yi-coder:9b
To exit the prompt, use Ctrl + D or type /bye.
Manage your models.
ollama help
ollama list
ollama ps
ollama stop yi-coder:9b
ollama rm yi-coder:9b
RUNNING AND TESTING
To make Ollama reachable over your network, modify the service configuration:
sudo nano /etc/systemd/system/ollama.service
Add the following environment variables to the [Service] section to bind to all network interfaces:
[Unit]
Description=Ollama Service
After=network-online.target

[Service]
Environment="OLLAMA_HOST=0.0.0.0"
Environment="OLLAMA_ORIGINS=*"
ExecStart=/usr/local/bin/ollama serve
User=ollama
Group=ollama
Restart=always
RestartSec=3
Environment="PATH=/usr/local/sbin:/usr/local/bin:/usr/sbin:/usr/bin:/sbin:/bin"

[Install]
WantedBy=default.target
Reload to apply.
sudo systemctl daemon-reload
sudo systemctl restart ollama
sudo systemctl status ollama
From a remote host, test the connection via an HTTP request:
curl -s http://192.168.1.101:11434/api/generate -d '{
  "model": "qwen2.5-coder:1.5b-base",
  "prompt": "When was Python 3 first released?",
  "stream": false
}'
Example output.
{
  "model": "qwen2.5-coder:1.5b-base",
  "created_at": "2026-02-07T01:34:02.891211247Z",
  "response": "<redacted_for_brevity>",
  "done": true,
  "done_reason": "stop",
  "context": [
    <redacted_for_brevity>
  ],
  "total_duration": 260501788901,
  "load_duration": 2392809850,
  "prompt_eval_count": 7,
  "prompt_eval_duration": 687966008,
  "eval_count": 1065,
  "eval_duration": 253858547320
}
Success!
BENCHMARKING
The llm-benchmarking tool measures inference speed (tokens per second) on your hardware [Link].
sudo apt install python3-venv -y
python3 -m venv .venv
source .venv/bin/activate
pip install llm-benchmark
nano custom.yml
file_name: "custom.yml"
version: 2.0.custom
models:
- model: "yi-coder:9b"
- model: "codellama:7b"
- model: "qwen2.5-coder:7b"
- model: "qwen2.5-coder:3b"
- model: "qwen2.5-coder:14b"
- model: "deepseek-coder:6.7b"
- model: "qwen2.5-coder:1.5b-base"
- model: "deepseek-coder:1.3b"
llm_benchmark run --custombenchmark=custom.yml
Here are some acceptable results (summarized for brevity) using an NVIDIA P4 (PG414) 8GB VRAM [Link].
----------------------------------------
model_name =    deepseek-coder:1.3b
Average of eval rate:  125.67  tokens/s
----------------------------------------
model_name =    qwen2.5-coder:1.5b-base
Average of eval rate:  87.382  tokens/s
----------------------------------------
model_name =    qwen2.5-coder:3b
Average of eval rate:  53.126  tokens/s
----------------------------------------
model_name =    deepseek-coder:6.7b
Average of eval rate:  35.746  tokens/s
----------------------------------------
model_name =    codellama:7b
Average of eval rate:  34.978  tokens/s
----------------------------------------
model_name =    qwen2.5-coder:7b
Average of eval rate:  28.172  tokens/s
----------------------------------------
model_name =    yi-coder:9b
Average of eval rate:  26.79  tokens/s
----------------------------------------
model_name =    qwen2.5-coder:14b
Average of eval rate:  2.286  tokens/s
----------------------------------------
Note: Eval rates >30 tokens/s are excellent, while <10 tokens/s are extremely slow. The command ollama ls shows which processor is being used. In this case, the model did not fit entirely on the GPU, so the CPU is handling a few layers.
![]()
Here are slightly better results using an NVIDIA T4 (PG183) 16GB VRAM [Link].
(pending)
Here are some unacceptable results that fell back to the CPU.
----------------------------------------
model_name = deepseek-coder:1.3b
Average of eval rate: 7.364 tokens/s
----------------------------------------
model_name = qwen2.5-coder:1.5b-base
Average of eval rate: 5.154 tokens/s
----------------------------------------
model_name = deepseek-coder-v2:16b
Average of eval rate: 3.428 tokens/s
----------------------------------------
model_name = qwen2.5-coder:3b
Average of eval rate: 2.942 tokens/s
----------------------------------------
model_name = deepseek-coder:6.7b
Average of eval rate: 1.328 tokens/s
----------------------------------------
model_name = qwen2.5-coder:14b
Average of eval rate: 0.704 tokens/s
----------------------------------------
Note: Without GPU acceleration, eval rates are extremely slow.
![]()
If this is your situation (as in the example above), verify that the GPU drivers and kernel modules are properly installed and loaded. Choose the architecture carefully: AMD (Polaris, Vega, RDNA 3+) or NVIDIA (Pascal, Turing, Ampere).
As a last resort, try overwriting the service file:
nano /etc/systemd/system/ollama.service
[Service]
Environment="HSA_OVERRIDE_GFX_VERSION=8.0.3"
#Environment="OLLAMA_VULKAN=1"
systemctl daemon-reload
systemctl restart ollama
sleep 10
journalctl -u ollama.service --since "1 minute ago"
In the following output, it was unsuccessful. Hopefully you’ll have better luck.
...
level=INFO source=runner.go:67 msg="discovering available GPUs..."
level=WARN source=runner.go:485 msg="user overrode visible devices" HSA_OVERRIDE_GFX_VERSION=8.0.3
level=WARN source=runner.go:489 msg="if GPUs are not correctly discovered, unset and try again"
...
INTEGRATION
On VS Code, install popular extensions like Continue or Roo Code to use your local models for autocomplete and chat.
Example configuration for Continue.
nano ~/.continue/config.yaml
name: Local Config
version: 1.0.0
schema: v1
models:
  - name: "Nerdsking Python 7B"
    provider: ollama
    model: hf.co/Nerdsking/Nerdsking-python-coder-7B-i:latest
    apiBase: http://192.168.1.101:11434
    roles: ["autocomplete", "edit", "apply", "chat"]

  - name: "Qwen2.5 Coder 7B"
    provider: ollama
    model: qwen2.5-coder:7b
    apiBase: http://192.168.1.101:11434
    roles: ["autocomplete", "edit", "apply", "chat"]

  - name: "YI-coder 9B"
    provider: ollama
    model: yi-coder:9b
    apiBase: http://192.168.1.101:11434
    roles: ["autocomplete", "edit", "apply", "chat"]

tabAutocompleteModel:
  name: "Nerdsking Python 3B"
  provider: ollama
  model: hf.co/Nerdsking/nerdsking-python-coder-3B-i:Q8_0
  apiBase: http://192.168.1.101:11434
Example configuration for Roo Code.
(pending)
HUGGING FACE & GGUF
Hugging Face makes it easy to use a model on virtually any framework, app, or cloud.
GGUF (GPT-Generated Unified Format)
- A binary model file format
- Bundles quantization and metadata in a single file
- Enables fully offline inference
If the model on HF includes a .gguf file, pulling it into Ollama is as simple as:
ollama pull hf.co/Nerdsking/Nerdsking-python-coder-7B-i
Or
ollama pull hf.co/Nerdsking/nerdsking-python-coder-3B-i:Q8_0
Alternatively, download the .gguf file manually and create a model from it.
echo 'FROM ./flux1-dev-Q4_1.gguf' > Modelfile
ollama create flux1-dev-Q4_1 -f Modelfile
- Why run Hugging Face models with Ollama?
- It’s the easiest way to interact with models, especially for coding integrations.
- What are Ollama’s limitations?
- For specialized models, such as image generation, it’s better to use dedicated apps or write your own code.
Downloading Models
Install the HF CLI tool.
curl -LsSf https://hf.co/cli/install.sh | bash
curl -sSfL https://hf.co/git-xet/install.sh | sudo sh
Optionally, log in to HF.
hf auth login
Preview the download, then proceed.
hf download unsloth/Z-Image-GGUF z-image-Q6_K.gguf --local-dir ./models --dry-run
hf download unsloth/Z-Image-GGUF z-image-Q6_K.gguf --local-dir ./models
Or download the entire repository.
hf download black-forest-labs/FLUX.1-dev
Coding with AI
There are multiple ways to install dependencies, but here I’ll demonstrate using pre-built container images for image generation.
docker pull huggingface/transformers-pytorch-gpu:latest
docker run -it --gpus all -v $(pwd)/models:/root/.cache/huggingface --name hf huggingface/transformers-pytorch-gpu:latest /bin/bash
python3 -c "import torch; print(f'CUDA Available: {torch.cuda.is_available()}'); print(f'Device Name: {torch.cuda.get_device_name(0) if torch.cuda.is_available() else \"None\"}')"
![]()
Build with CUDA support to use your GPU.
CMAKE_ARGS="-DSD_CUDA=ON" pip install stable-diffusion-cpp-python
Install common dependencies.
pip install diffusers accelerate transformers sentencepiece
pip install --root-user-action=ignore gguf
Now create and run the example script for your chosen model on HF. Here is a basic example.
from diffusers import DiffusionPipeline
import torch
pipe = DiffusionPipeline.from_pretrained(
    "<MODEL_NAME_HERE>",
    torch_dtype=torch.float16
)
pipe.to("cuda")
prompt = "Happy family, detailed lighting, 8k"
negative_prompt = "low quality, blurry, deformed"
image = pipe(
    prompt=prompt,
    negative_prompt=negative_prompt,
    num_inference_steps=18,
    guidance_scale=8
).images[0]
image.save("generated_image.png")
To return to or open a new terminal in the container:
docker start hf
docker exec -it hf /bin/bash
Alternatively, look for instructions on running interesting Spaces locally.
LOCALAI
LocalAI is a full-featured AI stack that runs in Docker, making it OS-agnostic.
curl -L https://install.localai.io | sh
Or
docker run --gpus all -p 8080:8080 -v $(pwd)/models:/models -v $(pwd)/backends:/backends --name local-ai -itd localai/localai:latest
Models and backend engines are stored externally, keeping the container ephemeral while persisting your data.
Access the dashboard at http://localhost:8080
READ MORE
Interacting Directly with Ollama’s API [Link]