If you haven’t read the previous post, CEPH Deployment and Concepts [Link], you might want to check that out first, then come back to this one.
CEPH management is not a trivial task. Although its dashboard is improving significantly with every release, it does not offer all the features and control of the CLI.
This cheat sheet contains commands and equivalent screenshots for a series of useful setup and management tasks.
Single Node Cluster
- If running a single-node cluster for learning or testing, the following commands may allow it to work (not recommended in production).
ceph config set global osd_pool_default_size 1
ceph config set global mon_allow_pool_size_one true
ceph orch apply mon --placement=1
ceph orch apply mgr --placement=1
MANAGING OSDs
On the Cluster
- Start by checking the inventory of disks and entering the CephAdm shell.
cephadm ceph-volume inventory
cephadm shell
- Create OSDs for each disk across all nodes in the cluster.
ceph orch device ls
ceph orch daemon add osd ceph-node-1:/dev/vdb
ceph orch daemon add osd ceph-node-2:/dev/vdc
ceph orch device ls --refresh
OR
ceph orch apply osd --all-available-devices
- Check the status of the OSDs.
ceph osd status
ceph osd tree


CEPHFS
On the Cluster
- Create at least one MDS for serving the file system.
ceph orch apply mds cephfs 1
ceph mds stat
ceph orch ps --daemon-type=mds
- The file system requires two pools: one for data and one for metadata.
ceph osd pool create cephfs_data 128
ceph osd pool create cephfs_metadata 32
- If running a single-node cluster for learning or testing, the following commands may allow it to work (not recommended in production).
ceph config set mon mon_allow_pool_size_one true
ceph osd pool set cephfs_metadata size 1 --yes-i-really-mean-it
ceph osd pool set cephfs_data size 1 --yes-i-really-mean-it
- Check the status of the pools.
ceph osd pool ls detail
- Create the file system.
ceph fs new cephfs cephfs_metadata cephfs_data
ceph fs ls
- For testing, grant full permissions to
adminand retrieve its key. In production, use service accounts with minimal permissions for each client.
ceph auth caps client.admin mon 'allow *' mds 'allow *' osd 'allow *' mgr 'allow *'
ceph auth get-key client.admin
On the Client
- Install or update the necessary libraries and tools to mount CephFS.
sudo apt update
sudo apt install ceph-common -y
- Then mount it. Replace the placeholder secret and any other parameters as needed.
sudo mkdir /mnt/cephfs
sudo mount -t ceph ceph-node-1:6789:/ /mnt/cephfs -o name=admin,secret=AQBvxwhlAAAABBAA7O8ROk2EkJ6WrgG+5ckH4w==
NFS WITHOUT RGW
Since version 16 (Pacific), Ceph can export native CephFS volumes directly via NFS, without using RGW. This is made possible through tighter integration of NFS Ganesha with the CephFS backend, and is called the Ceph NFS Service Gateway.

On the Cluster
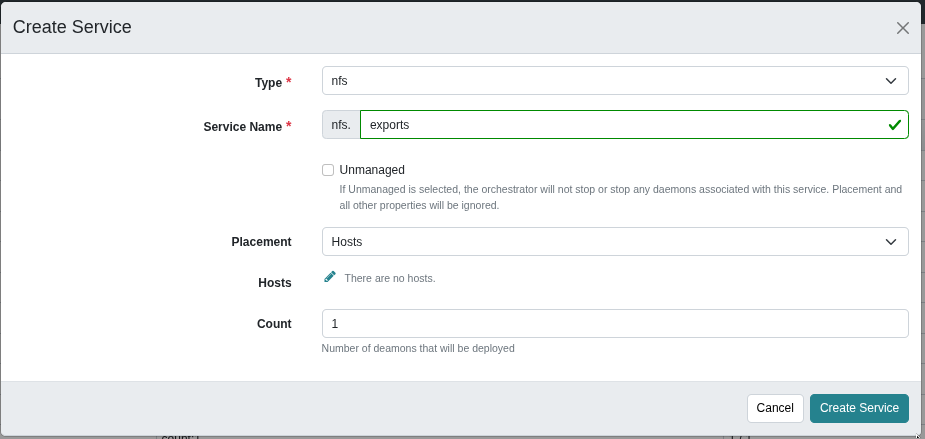
- Create the NFS service.
ceph orch apply nfs exports --placement=1
ceph nfs cluster ls
This command is equivalent to navigating through the UI.
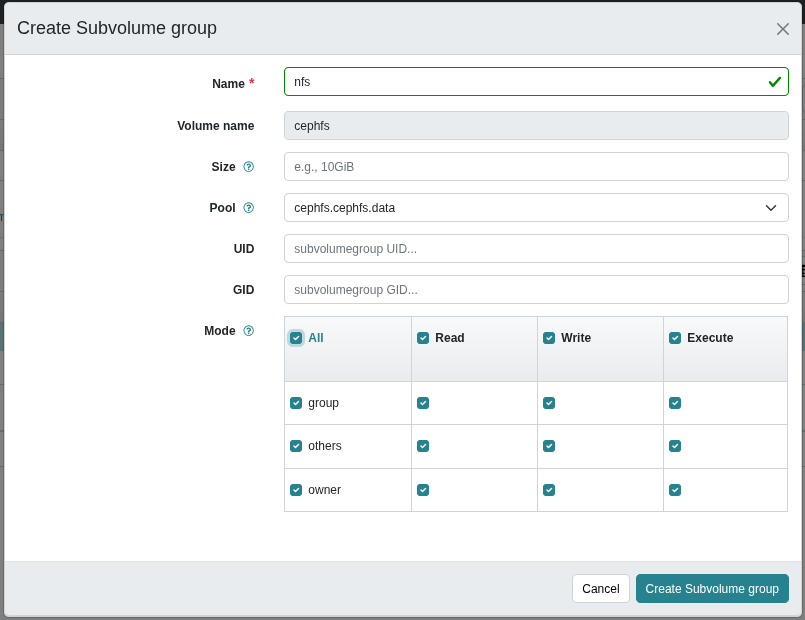
- Create a volume and subvolume group.
ceph fs volume create cephfs
ceph fs subvolumegroup create cephfs nfs --mode 0777
This command is equivalent to navigating through the UI.


- Create the NFS export.
ceph nfs export create cephfs exports /volumes/nfs cephfs --path /volumes/nfs --pseudo-path /path/export1 --squash no_root_squash
Note: optionally, add source permissions using --clients 192.168.1.0/24=RW,no_root_squash.
This command is equivalent to navigating through the UI.

On the Client
- Mount the NFS export.
sudo mount -t nfs ceph-node-1:/path/export1 /mnt/cephfs
RADOS BLOCK DEVICE
(in progress)
RGW + iSCSI
(in progress)
RGW + SMB
(in progress)
RGW + S3
(in progress)
TROUBLESHOOTING
- Handy commands.
ceph health detail
ceph -W mon
cephadm ls | grep rgw
cephadm logs --name rgw.export1.ceph.auzhhi
- Sometimes Ceph does not identify volumes as ready to use. The screenshots below show how it looks before and after resolving the issue.


- The recommended approach is to fully wipe the disk first. This allows Ceph to set up LVM automatically.
wipefs -a /dev/vdb
ceph orch daemon add osd ceph-node-1:/dev/vdb
- Alternatively, create the LVM manually first.
sudo pvcreate /dev/vdb
sudo vgcreate ceph-vg /dev/vdb
ceph orch daemon add osd ceph-node-1:ceph-vg
- The least recommended approach is adding it as a raw volume, as this disables features like expansion and migration.
ceph orch daemon add osd --method raw ceph-node-1:/dev/vdb
Service Accounts and Permissions
- The following is suitable for testing or troubleshooting.
ceph auth caps client.admin mon 'allow *' mds 'allow *' osd 'allow *' mgr 'allow *'
ceph auth get-key client.admin
ceph auth get client.admin -o /etc/ceph/ceph.client.admin.keyring
- Using the principle of least privilege, create service accounts tailored to each service.
ceph auth get-or-create client.cephfsuser mon 'allow r' mds 'allow r, allow rw path=/mydata' osd 'allow rw tag cephfs data=*' -o /etc/ceph/ceph.client.cephfsuser.keyring
- Inspect a specific NFS export, save it to a file, and re-import it.
ceph nfs export get exports /path/export
ceph nfs export get exports /path/export > export.json
ceph nfs export update exports -i export.json
- Force-remove an OSD.
cephadm logs --name osd.5
ceph osd out 5
ceph osd purge 5 --yes-i-really-mean-it
ceph orch daemon rm osd.5 --force
- Wipe and re-add a drive.
ceph orch device zap ceph5 /dev/sdb --force
ceph orch daemon add osd ceph5:/dev/sdb
- Remove an offline host from the cluster.
ceph orch host rm ceph5 --offline --force
- Always refer to the official documentation [Link].
BONUS
How to use CephFS as persistent storage in Kubernetes?
Start by creating a secret to store the username and password.
apiVersion: v1
kind: Secret
metadata:
  name: cephfs-secret
  namespace: default
stringData:
  adminID: <username_here>
  adminKey: <password_here>
Configure how Kubernetes will provision volumes in CephFS.
apiVersion: storage.k8s.io/v1
kind: StorageClass
metadata:
  name: cephfs-sc
provisioner: cephfs.csi.ceph.com
parameters:
  # Comma-separated list of MONs
  monitors: 192.168.1.131:6789,192.168.1.132:6789,192.168.1.133:6789,192.168.1.134:6789,192.168.1.135:6789,192.168.1.136:6789,192.168.1.137:6789,192.168.1.138:6789
  # Filesystem name and path
  fsName: myfs
  rootPath: /k8s-volumes
  # Ceph user and secret
  csi.storage.k8s.io/provisioner-secret-name: cephfs-secret
  csi.storage.k8s.io/provisioner-secret-namespace: default
  csi.storage.k8s.io/node-stage-secret-name: cephfs-secret
  csi.storage.k8s.io/node-stage-secret-namespace: default
reclaimPolicy: Delete
mountOptions:
  - debug
allowVolumeExpansion: true
Then use it like any other PVC.
apiVersion: v1
kind: PersistentVolumeClaim
metadata:
  name: cephfs-pvc
spec:
  accessModes:
    - ReadWriteMany
  storageClassName: cephfs-sc
  resources:
    requests:
      storage: 1Gi
And claim volumes in pod or deployment manifests.
apiVersion: v1
kind: Pod
metadata:
 name: cephfs-test
spec:
  containers:
    - name: app-test
      image: busybox
      command: ["sh", "-c", "while true; do date >> /mnt/data/log.txt; sleep 5; done"]
      volumeMounts:
        - name: cephfs-storage
          mountPath: /mnt/data
  volumes:
    - name: cephfs-storage
      persistentVolumeClaim:
        claimName: cephfs-pvc