Ceph is an open-source, distributed storage system designed to provide high performance, reliability, and scalability. It supports object, block, and file storage in a unified platform, though not all storage types are available out of the box (more on that later) [Link] [Link].
Ceph differs from the traditional model of large (usually proprietary) storage appliances and the Client-Server architecture by leveraging Layer 3 networks to implement a Client-Cluster model instead.
Unlike ZFS and NFS, which are centralized and contained within a single appliance, Ceph coordinates between multiple devices and nodes. While Ceph is POSIX compliant, NFS is not fully compliant, though it handles most workloads without issue.
Core concepts and nomenclature:
Refer to the official documentation for more details [Link].
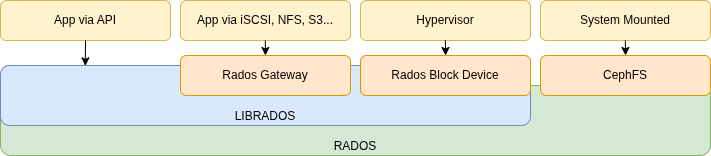
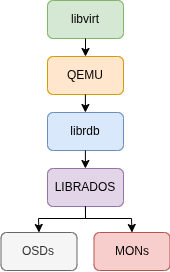
- OSD
- Object Storage Device
- Each discrete HDD or SSD.
- Object Storage Daemon
- A process that manages the Object Storage Device.
- This is where data is actually stored.
- Object Storage Device
- MON
- Monitors OSDs and controls authentication.
- RADOS
- Manages OSDs.
- LIBRADOS
- LIBRADOS APIs are the native interface for communicating directly with RADOS.
- Client applications must use LIBRADOS libraries [Link].
- GATEWAY
- Exports Ceph as iSCSI, SMB, NFS, S3, etc. using LIBRADOS under the hood.
- Client applications are unaware that Ceph is running behind the scenes.
- RBD
- RADOS Block Devices.
- MDS
- Metadata Services for the Ceph File System (not used by Block Devices or Object Store).
- Offloads OSDs from the task of indexing file metadata.
How is data allocated?
- Pool
- Each Pool is mapped to a group of disks.
- Replicated – defines the number of replicas/copies of each object, similar to RAID 1.
- A replica count of 3 means 200% overhead.
- Erasure Coding – stripes the data and creates encoded redundancy parity. Redundancy of 1 and 2 are equivalent to RAID 5 and 6, respectively.
- A 4-stripe with parity of 2 is called 4+2, and results in 50% overhead.
- Storage efficiency comes at the cost of CPU overhead.
- Replicated – defines the number of replicas/copies of each object, similar to RAID 1.
- Each Pool is mapped to a group of disks.
- PG
- Placement Groups are mapped to OSDs.
- The general rule of thumb from Ceph documentation is approximately 100 PGs per OSD.
- Starting with Nautilus, PGs can be merged or split, enabling the PG auto-scaler (recommended).
- Objects
- By default, objects are 4 MB fragments of data sets (e.g., files, block devices, etc.).
So, Files are split into Objects, which are sent to a PG (within a Pool) to be distributed across its OSDs.

- KVM virtualization uses the RBD library for direct communication with OSDs and MONs.
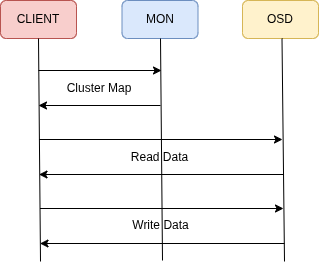
- When using LIBRADOS, client applications can fetch the Cluster Map from the MONs and communicate directly with the OSDs responsible for the data.
FACTS OF CEPH
When a Pool reaches 85% capacity, a warning is raised.
If utilization reaches 90%, the volume becomes read-only until additional OSDs are added.
If an OSD Daemon stops communicating with its peers, it takes 5 minutes for the quorum to consider it offline. Only then does self-healing begin, with no human intervention required.
For data consistency, a client write is only acknowledged once all copies have been written. The client sends data to a single OSD over the Public Network, and that OSD is responsible for replicating it to the other OSDs over the Internal Network.
Docker or Podman must be available on all nodes, as Ceph processes (OSDs, MONs, etc.) run as containerized applications.
DESIGNING A CLUSTER
- MONs can coexist with OSDs in small and medium-sized clusters.
- As a rule of thumb, this works for up to 10 to 16 nodes, depending on the number of OSDs per node.
- Gateways should have dedicated hardware.
- Gateways require high throughput due to their role as traffic forwarders, similar to a proxy.
- Public (Front) Network and Internal (Back) Network
- Do not share the Front and Back networks, as doing so will severely impact throughput and latency.
- The Back network should be at least as fast as the Front network to avoid becoming a bottleneck for client traffic.
- Failure Domains
- Each Failure Domain (e.g., a rack) should be self-sufficient, containing its own MONs, MGRs, MDSs, Gateways, etc.
- Resource Allocation per Node (Bare Metal Host)
- Reserve 4 CPU cores and 16 GB of RAM for the OS.
- The remaining resources can be allocated as follows:
- 1 CPU core (or thread) per OSD.
- 5 GB of RAM per OSD.
- Note: each HDD/SSD will have its own OSD Daemon, so the calculation above determines the maximum optimal number of drives per node.
- If MONs coexist with OSDs, account for their resource usage in the calculation above.
Capacity Calculation by Node Resources
Cores / Threads
GB of RAM
Operating System Reserved
Cores / Threads
GB of RAM
Number of Processes: 15 OSDs
Note: the value above is a guide for properly sizing a node. Decisions on how much to under- or over-provision require further evaluation of the hardware and environment.
CEPH DEPLOYMENT
If you find documentation or tutorials that reference the ceph-deploy tool, note that it is deprecated and has been replaced by cephadm.
On Debian 12, fresh install nodes.
Make sure all hosts are up to date, have all dependencies installed, and have their clocks synchronized with chrony or ntpd.
sudo su -
apt update && apt upgrade -y
apt install gpg chrony openssh-server lvm2 curl nano docker.io -y
Optionally, make all nodes aware of each other by editing /etc/hosts or by using a DNS server.
10.1.1.11 ceph-node-1
10.1.1.12 ceph-node-2
10.1.1.13 ceph-node-3
10.1.1.14 ceph-node-4
10.1.1.15 ceph-node-5
On the admin host, install cephadm.
apt install lsb-release gnupg -y
curl --silent --remote-name https://download.ceph.com/keys/release.asc
gpg --no-default-keyring --keyring ./ceph-release.gpg --import release.asc
gpg --no-default-keyring --keyring ./ceph-release.gpg --export > /etc/apt/trusted.gpg.d/ceph.gpg
echo deb https://download.ceph.com/debian-squid/ $(lsb_release -sc) main | tee /etc/apt/sources.list.d/ceph.list
apt update && apt install cephadm -y
Note: not all versions of Debian or Ubuntu have pre-built packages in the repository. As of this writing (June 2025), there is no noble build available, so use focal instead. Check for the latest release [Link], then confirm packages are available for your distribution [Link].
Bootstrap the Ceph Cluster:
cephadm bootstrap --mon-ip 192.168.1.11 --cluster-network 10.1.1.0/24 --ssh-user root
Note: the Public network, where clients access Ceph resources and services, is 10.10.10.0/24. The Internal network, 10.1.1.0/24, is used exclusively for communication between nodes, specifically for OSD data replication.
Sample output, including the UI credentials and instructions for opening the shell.
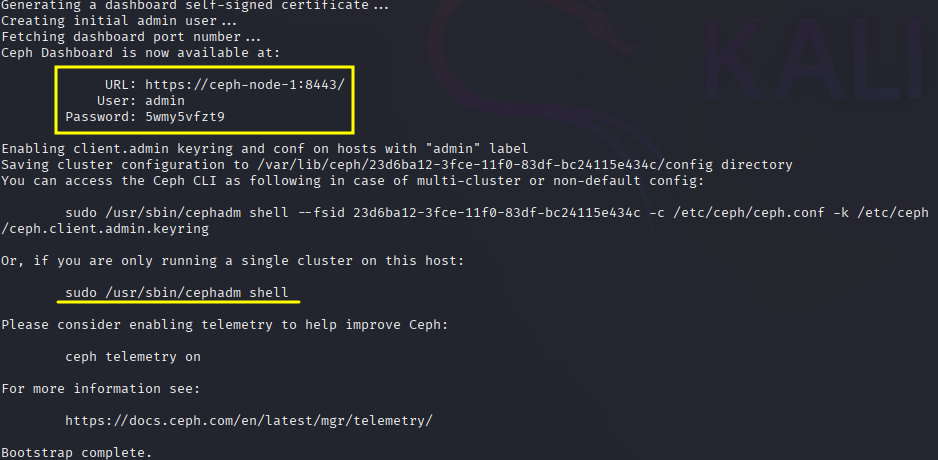
Before opening the Dashboard, copy the generated SSH public key.
cat /etc/ceph/ceph.pub
Then paste it into the root authorized keys file on all other nodes.
sudo nano /root/.ssh/authorized_keys
WEB-UI SETUP
Navigate to https://10.10.10.11:8443 to complete the setup. Use the credentials generated in the previous step.
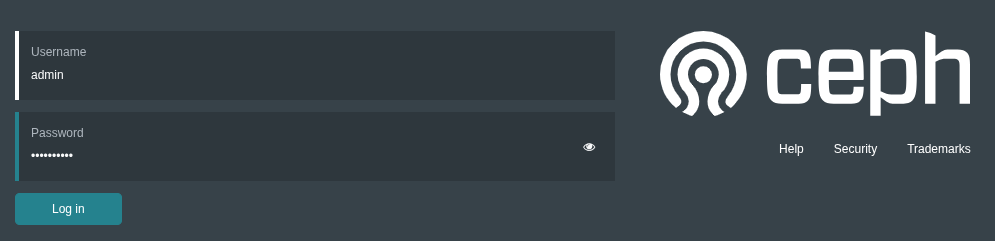
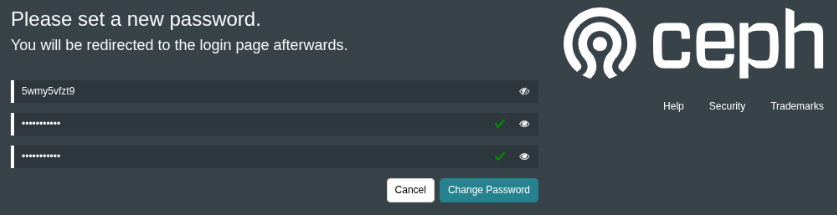
You will be prompted to change the password.
After signing in, an Expand Cluster button will appear. This wizard will guide you through the setup process.

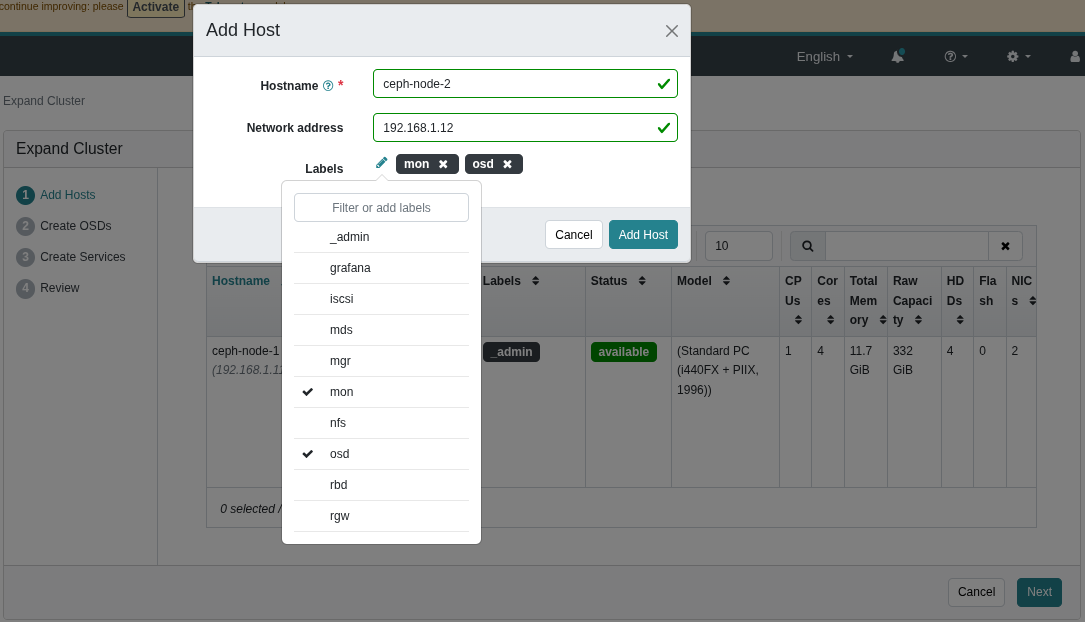
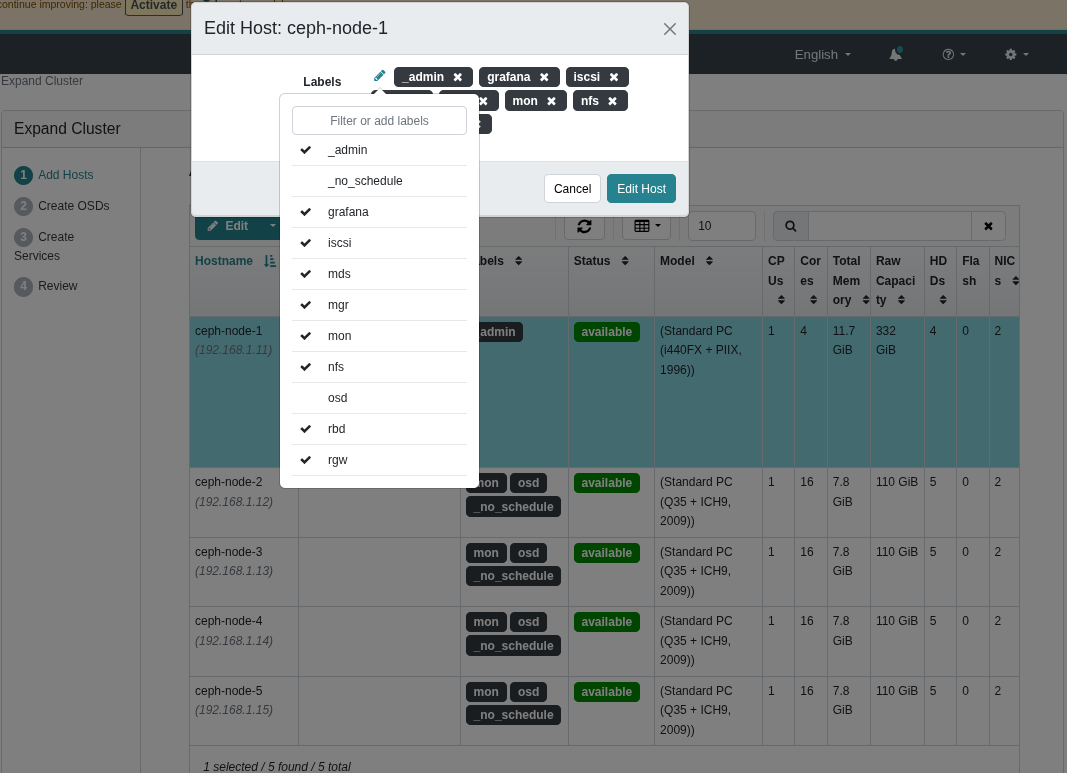
The first step is to add nodes to the cluster.
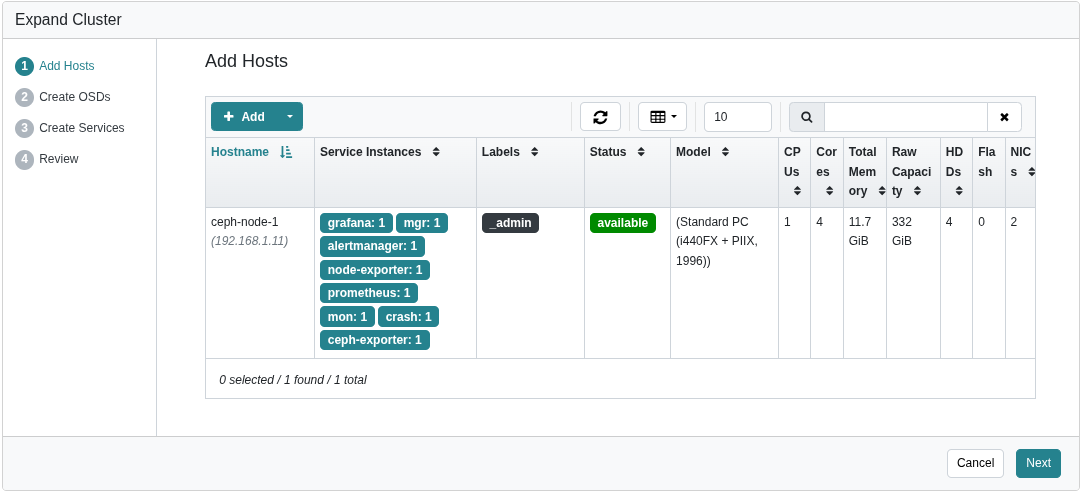
In this example, Nodes 2 through 5 were assigned the MON and OSD roles.
Node 1 was then edited to include all roles except OSD and _no_schedule.
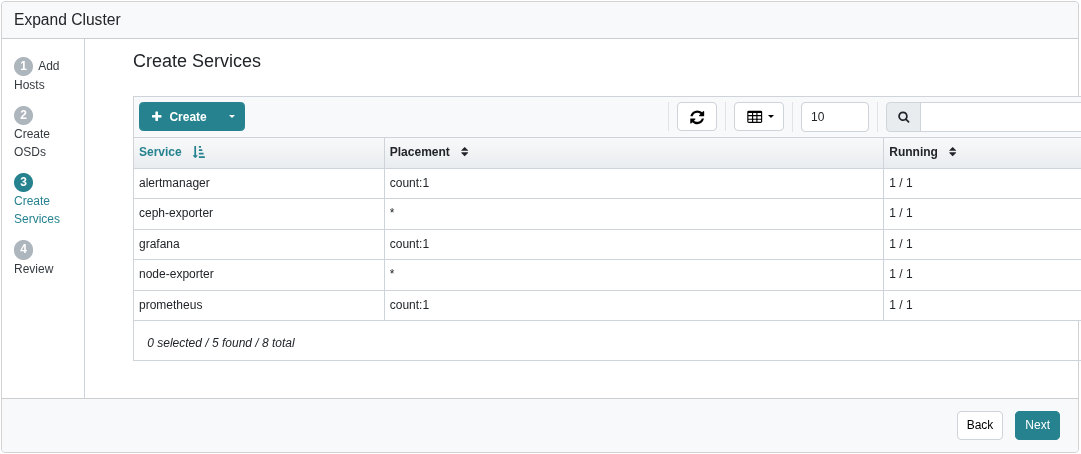
On the following steps, select the options that best suit your requirements.
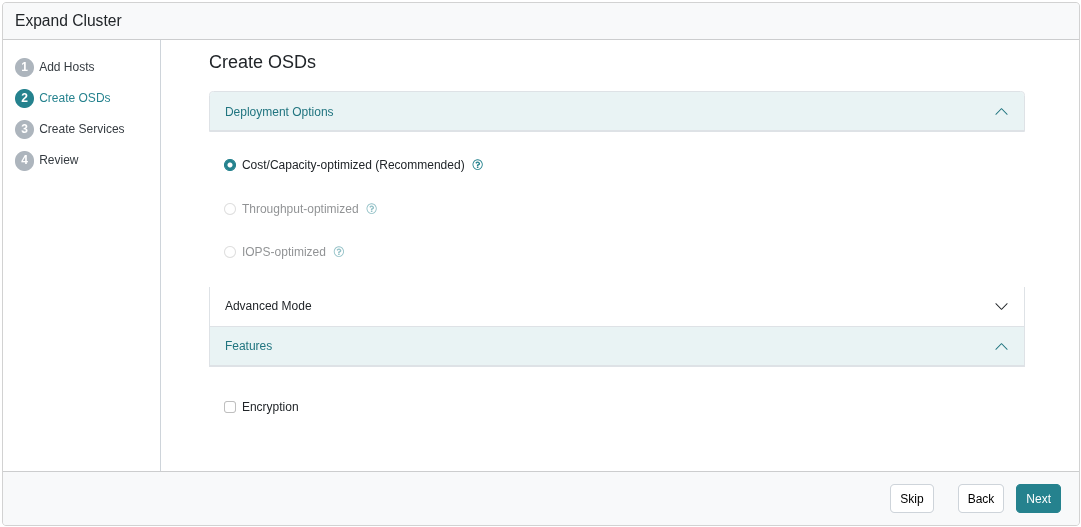
In this example, no changes were made.
Click Expand Cluster to complete the cluster creation.
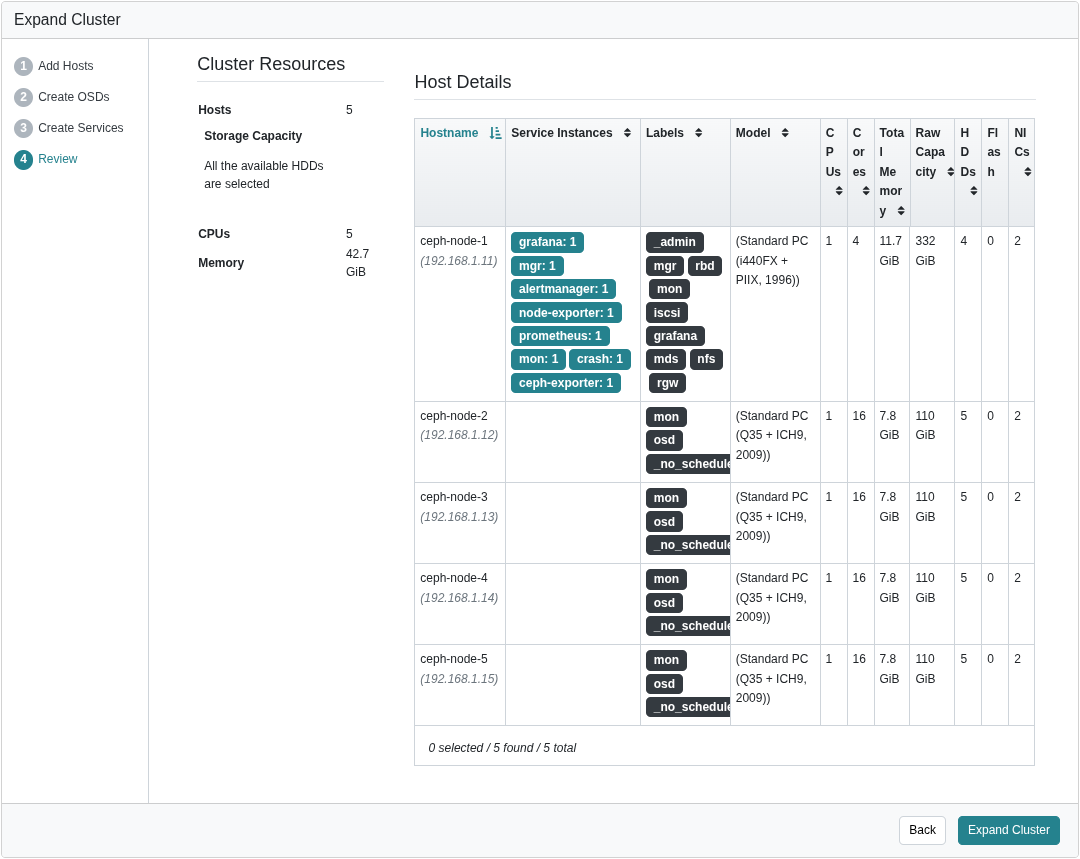
It may take several minutes for all components to be deployed and reach a healthy state.

The graph below shows internal network (10.1.1.0/24) traffic during a data rebalance, which occurs when a failed drive is replaced or a new host is added to the cluster.

Note: no interactivity or intervention is required. This all happens silently and autonomously.
In the next post, I will walk through setting up volumes, services, and accessing the storage remotely.