Hashicorp Vault is an open-source tool for storing and controlling access to secrets, such as tokens, passwords, certificates, encryption keys, and other sensitive data. It can be accessed manually through a UI, programmatically using the CLI, or via the HTTP API [Link].
With Vault, specific actions (e.g., read, create, update, delete) can be granted on specific secrets, enabling full separation of duties for a defined duration (auto-expire) or a designated call source.
INSTALLING VAULT
Using Snap on Ubuntu/Debian:
sudo apt install snapd -y
sudo snap install vault
Alternatively, add the official repository to the system’s package manager.
wget -O - https://apt.releases.hashicorp.com/gpg | sudo gpg --dearmor -o /usr/share/keyrings/hashicorp-archive-keyring.gpg
echo "deb [arch=$(dpkg --print-architecture) signed-by=/usr/share/keyrings/hashicorp-archive-keyring.gpg] https://apt.releases.hashicorp.com $(grep -oP '(?<=UBUNTU_CODENAME=).*' /etc/os-release || lsb_release -cs) main" | sudo tee /etc/apt/sources.list.d/hashicorp.list
sudo apt update && sudo apt install vault -y
See more installation methods at [Link].
Edit the configuration file:
sudo nano /etc/vault.d/vault.hcl
ui = true
disable_mlock = true
default_lease_ttl ="87600"
max_lease_ttl = "87600"
storage "file" {
  path = "/opt/vault/data"
}

# HTTP listener
listener "tcp" {
  address = "127.0.0.1:8200"
  tls_disable = 1
}
systemctl enable vault --now
export VAULT_ADDR=http://127.0.0.1:8200
vault status
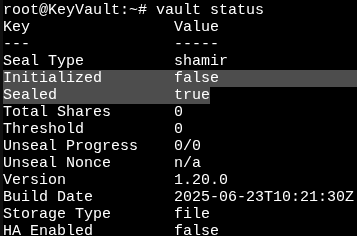
Note: Vault is not yet initialized and is currently sealed.
Navigate to http://127.0.0.1:8200, or create an SSH tunnel as follows.
INITIALIZE AND UNSEAL THE VAULT
ssh root@192.168.1.200 -L 8200:localhost:8200
Vault can be initialized via the Web UI:
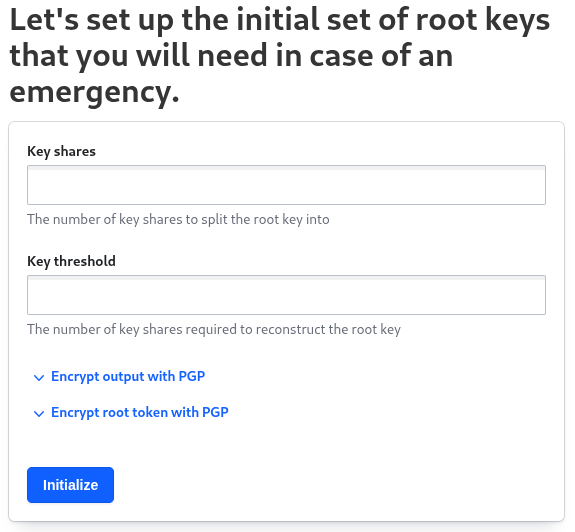
Or via the CLI:
export VAULT_ADDR=http://127.0.0.1:8200
vault operator init
OR
vault operator init -key-shares=5 -key-threshold=3 > keys.json
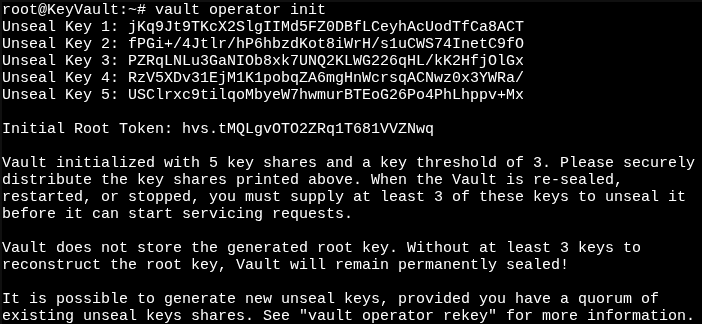
Now unseal the Vault:
vault operator unseal
Provide the Unseal Keys from the previous step.
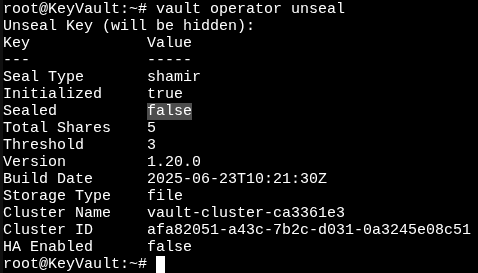
Vault is now ready to be accessed with the Initial Root Token.
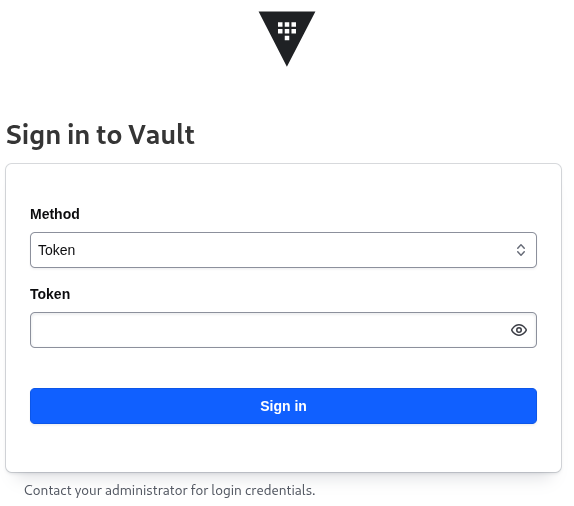
Log in with the Initial Root Token:
vault login
Development (Unsafe) Deployment
In a development environment where reduced security is acceptable:
export VAULT_ADDR=http://127.0.0.1:8200
vault operator init -key-shares=1 -key-threshold=1 -format=json > init.json
vault operator unseal $(jq -r '.unseal_keys_b64[0]' init.json)
vault login $(jq -r '.root_token' init.json)
MANAGING POLICIES AND TOKENS
Using the Initial Root Token, enable a KV secrets engine:
export VAULT_ADDR=http://127.0.0.1:8200
vault login
vault secrets enable -path=kv kv
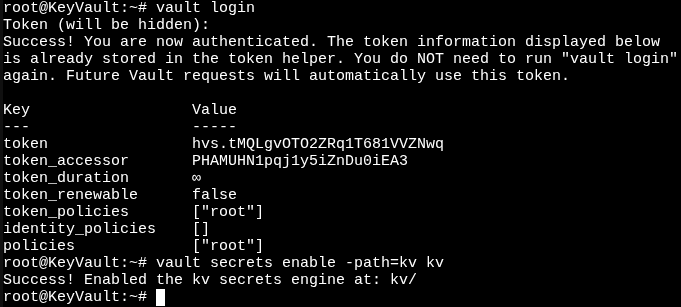
Create Policies:
cat <<EOF > readonly-policy.hcl
path "kv/*" {
capabilities = ["read", "list"]
}
EOF
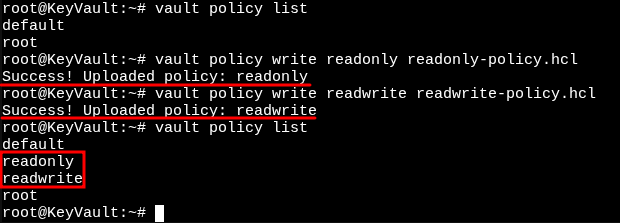
vault policy write readonly readonly-policy.hcl
cat <<EOF > readwrite-policy.hcl
path "kv/*" {
capabilities = ["create", "read", "update", "delete", "list"]
}
EOF
vault policy write readwrite readwrite-policy.hcl
Note: These policies are overly permissive and should be used for reference only.
vault policy list
Create Tokens linked to policies:
vault token create -policy=readonly -orphan -no-default-policy -ttl=0
vault token create -policy=readwrite -orphan -no-default-policy -ttl=0
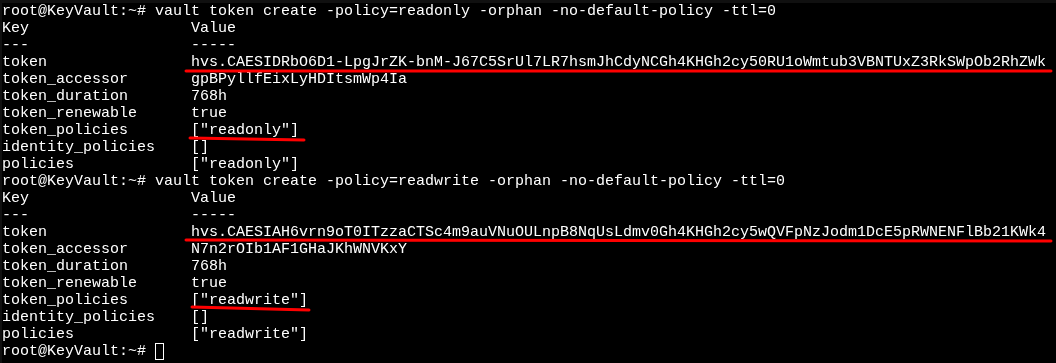
Note: These tokens are insecure and should be used for reference only. If needed, set the TTL to 87600 for a 10-year expiry.
To check a token’s permissions and status:
vault token lookup <TOKEN>
PUSHING AND PULLING SECRETS
Set the environment variables:
export VAULT_ADDR='http://127.0.0.1:8200/'
export VAULT_TOKEN=hvs.CAESIAH6vrn9oT0ITzzaCTSc4m9auVNuOULnpB8NqUsLdmv0Gh4KHGh2cy5wQVFpNzJodm1DcE5pRWNENFlBb21KWk4
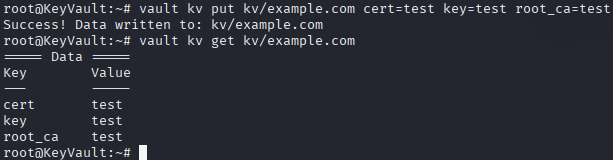
Test writing and reading a secret from another host:
vault kv put kv/example.com cert=test key=test root_ca=test
vault kv get kv/example.com
Write (create or update) a secret using Read+Write access:
vault kv put kv/example.com cert=@/etc/letsencrypt/live/example.com/cert.pem key=@/etc/letsencrypt/live/example.com/cert.pem root_ca=@/etc/letsencrypt/live/example.com/fullchain.pem
Note: The @ symbol loads the file’s contents, not the path string.
From another host, read the secret using Read-Only access:
export VAULT_ADDR='http://127.0.0.1:8200/'
export VAULT_TOKEN=hvs.CAESIDRbO6D1-LpgJrZK-bnM-J67C5SrUl7LR7hsmJhCdyNCGh4KHGh2cy50RU1oWmtub3VBNTUxZ3RkSWpOb2RhZWk
vault kv get kv/example.com

ISSUING AN SSL/TLS CERTIFICATE FOR VAULT
Before exposing Vault outside of localhost, secure it with a TLS certificate.
sudo apt update
sudo apt install certbot python3-certbot-nginx -y
sudo nano /etc/nginx/sites-available/default
Set the server name to your public domain. It must be reachable on port 80 from the internet with no restrictions, as Let’s Encrypt will send HTTP requests from multiple random sources for the challenge.
server_name vault.example.com;
Test and apply the configuration:
sudo nginx -t && sudo nginx -s reload
Run certbot and follow the prompts to enter your email, accept the terms, and so on.
echo 127.0.0.1 vault.example.com | sudo tee -a /etc/hosts
sudo certbot --nginx
Confirm that automatic renewal is configured in systemd:
sudo systemctl list-timers | grep certbot
If needed, place scripts in the following directories to run at specific points during renewal:
- /etc/letsencrypt/renewal-hooks/pre/
- Run before renewal
- /etc/letsencrypt/renewal-hooks/post/
- Run after successful renewal
- /etc/letsencrypt/renewal-hooks/deploy/
- Run after certificates are deployed
Update the Vault configuration to use the new certificates:
sudo nano /etc/vault.d/vault.hcl
# HTTP listener (disabled)
#listener "tcp" {
#  address = "127.0.0.1:8200"
#  tls_disable = 1
#}

# HTTPS listener
listener "tcp" {
  address       = "0.0.0.0:8200"
  tls_cert_file = "/etc/letsencrypt/live/example.com/cert.pem"
  tls_key_file  = "/etc/letsencrypt/live/example.com/privatekey.pem"
}
Grant Vault permission to read the certificate files:
sudo groupadd pki
sudo chgrp -R pki /etc/letsencrypt/archive
sudo chgrp -R pki /etc/letsencrypt/live
sudo chmod -R g+rx /etc/letsencrypt/archive
sudo chmod -R g+rx /etc/letsencrypt/live
sudo usermod -a -G pki vault
Restart Vault:
sudo systemctl restart vault.service
API calls can now use the following HTTPS address:
export VAULT_ADDR=https://vault.example.com:8200
BONUS
To issue SSL/TLS certificates using a DNS challenge (required for wildcards, and avoids exposing port 80 for the HTTP challenge), then store them in Vault.
Install ACME Shell [Link]:
curl https://get.acme.sh | sh -s [email protected]
acme.sh -h
Set the cPanel environment variables and issue the certificate:
export cPanel_Username="devops"
export cPanel_Apitoken="apitoken"
export cPanel_Hostname="https://cpanel.example.com:2083"
acme.sh --insecure --issue --keylength ec-256 --dns dns_cpanel -d example.com -d '*.example.com' --force --dnssleep 120
For Cloudflare:
export CF_Token="your_cloudflare_api_token"
export CF_Account_ID="your_cloudflare_account_id"
acme.sh --issue --keylength ec-256 --dns dns_cf -d example.com -d '*.example.com'
Upload the certificate to Vault:
cd ~/.acme.sh/example.com/
vault kv put kv/example.com [email protected] [email protected] [email protected] [email protected]
A notable alternative to Vault is Sealed Secrets by Bitnami [Link], designed for Kubernetes to prevent base64-encoded secrets from being stored in plaintext in manifests.